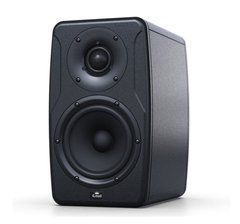
Choose monitors for the decisions you need to hear
Monitoring supports decisions about recordings, instrument balance, voices, space and unwanted noises. Begin with daily tasks: vocal recording, podcast editing, electronic production, band mixing or video work. One setup may cover several applications, but bass extension, available level and connection requirements can differ. Describe the material you work with most often rather than choosing from appearance or a headline power rating.
Do not judge solely by an impressive first demonstration. A useful system reveals small changes and makes familiar recordings understandable. Bring your projects and references with known vocals, bass and detail. Ask whether the speakers expose a specific problem rather than simply make the music more flattering. Consider session length and comfort at your normal listening level as part of the comparison.
Listening distance and workspace size
Start with speaker-to-listener distance, desk width and available positions. Nearfield does not mean any distance: check the particular model’s intended listening region. Sitting extremely close to a large multi-way system may not suit its driver integration, while greater distance increases room influence and level requirements. Room area alone cannot answer these questions.
Shape, height and layout matter alongside floor area. A long narrow space and an open room of equal size provide different conditions. Draw the desk, doors, windows, furniture and listening position. Preserve access to cables and controls. This supports selection for the actual geometry rather than a universal rule assigning a driver size to each number of square metres.
Active and passive arrangements
An active monitor includes amplification but still needs an appropriate signal source and power. A passive system needs a separate amplifier matched to its load and requirements. Never connect an amplified speaker output to an active monitor’s line input. Similar cabinet appearance does not establish an equivalent electrical arrangement or complete equipment list.
Check whether the product is sold singly, as a pair or as a set with shared amplification. For an active pair, account for outlets, signal cables and common volume control. For passive speakers, include the amplifier and its location. Compare the complete working setup rather than one catalogue price. Confirm box contents instead of inferring them from connectors shown in a photograph.
Driver size, frequency bands and bass extension
Woofer diameter is only one factor. Enclosure design, amplification and processing also determine performance. Do not infer bass depth or accuracy from size alone. Compare frequency specifications with their stated tolerances and conditions. A large cabinet cannot guarantee a better result in an unsuitable location, and published lower limits may use different measurement criteria.
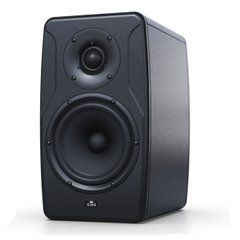
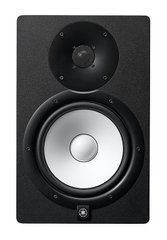
Evaluate two-way, three-way or coaxial designs in the intended listening region. Consider midrange clarity, behaviour at the required level and image stability during ordinary head movement. For deep-bass material, decide how it will be assessed: main monitors, an integrated subwoofer or an additional reference check. Avoid demanding unlimited extension from a compact system through maximum bass boost.
Connecting interfaces and other sources
Map the path from the computer or other source to each monitor. Check interface outputs, speaker inputs, operating levels and cables. Balanced operation requires suitable input, output and wiring; connector shape alone does not establish the entire arrangement. For consumer sources, verify format adaptation and volume control separately. Match the connection plan to the equipment you actually use.
A stereo headphone output is not two independent balanced line outputs. For several sources or monitor pairs, define the role of the interface or monitor controller. Connections should be repeatable without continually swapping leads. Lower the level before initial testing and follow the equipment instructions. Label left and right channels so maintenance does not require identifying them again.
Volume control and usable headroom
Daily work benefits from one clear overall level control. Set channel sensitivity to preserve pair balance and a practical adjustment range. If normal listening occupies a tiny part of the knob’s travel, check level matching between source and monitors. Do not compensate for an unsuitable gain arrangement through unrelated adjustments at several points.
Assess idle noise at the actual listening distance and determine whether it originates in the source, wiring or speaker. Headroom serves dynamic material rather than constant operation at the limit. Match listening levels when comparing models as closely as practical: a louder example can seem more convincing without helping your work. Include quiet editing conditions in the test rather than only energetic music playback.
Stereo geometry, height and orientation
Left and right monitors should operate under comparable conditions relative to the listener. Check distances, height and the recommended enclosure orientation. Do not lay a vertically intended model on its side merely to fit beneath a display without consulting its instructions. Driver arrangement and directivity affect the listening region, not just appearance.
Keep the path to the listener clear. Computer displays, large consoles and desktop objects can alter conditions. Mono material helps assess centre placement and differences between sides. If the image shifts, inspect connections, levels and physical symmetry first. Do not compensate by changing the project’s panning, which alters the programme instead of addressing the monitoring problem.
Desks, stands and nearby surfaces
A monitor on a large desk operates beside a reflective surface. Consider elevation or separate stands within the workspace design. Supports must be stable, suitable for the load and clear of required cabinet features. Do not balance heavy equipment on improvised objects that can move. Check cable routes so they do not pull the enclosure or obstruct ordinary work.
Isolation accessories may help mechanical interaction, but do not solve every acoustic issue. If objects rattle at particular notes, locate the cause. Compare positions using the same material and level. Follow model-specific guidance for wall proximity: a generic instruction to move every speaker an arbitrary distance ignores enclosure design and room geometry. A controlled comparison is more useful than repeated random repositioning.
The room and acoustic treatment
The listening result combines the monitor and room. A bass peak or dip does not necessarily indicate a defective speaker. Listener position, speaker placement and boundaries can change the response significantly. Before buying a more expensive model, identify whether the current difficulty belongs to the equipment or its environment. Keep material and level consistent while checking alternatives.
Plan treatment around measurements and tasks rather than the number of decorative panels. Absorption, early reflections and low-frequency behaviour involve different measures. Thin material on one wall cannot equalise the entire range. Establish geometry first, assess measurements and prioritise changes. This directs spending towards identified problems instead of accumulating accessories without a defined purpose.
DSP, correction and calibration
Onboard controls and software correction can adapt the setup, but capabilities vary by model. Determine whether a measurement microphone, interface or controller is required. DSP does not automatically mean room measurement. Check where settings are stored and whether they remain active without an application running. Shared workspaces need a clear way to identify the active profile.
Record initial placement and follow the specified procedure. Calibration is not a replacement for positioning and acoustic preparation. Afterwards, compare familiar recordings and check the working level. Save clearly named profiles, particularly with several listening positions or changing equipment. Repeat the assessment after substantial moves rather than treating a previous calibration as valid for every arrangement.
When a studio subwoofer is useful
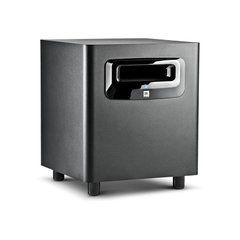
A subwoofer can extend monitoring where the main speakers cannot provide the required low-frequency capability. It is not simply a way to make the presentation larger. Integration involves crossover, level, phase or timing and placement. A poorly matched addition can make bass decisions less reliable even if it sounds more dramatic. Judge the practical monitoring benefit.
Check bass management and the connection path for the main monitors. Subwoofers differ in outputs, filters and bypass functions. Evaluate the transition region and several positions rather than one very low note. Plan space and cables before ordering. In a problematic room, define measurement and reference checks so that the result reflects integration rather than merely adding another cabinet.
Auditioning and checking mix decisions
Prepare isolated vocals, a dense mix, a bass line and material with clear ambience. Compare at similar levels without changing several settings at once. Listen for small equalisation changes, vocal balance and unwanted noises. Take notes rather than relying on memory after a demonstration. Your unfinished projects can reveal whether a system helps solve the decisions that matter.
After installation, learn the setup using known recordings. Check your work on familiar alternatives and look for recurring tendencies. This develops understanding of the workspace rather than requiring adjustment to imitate every other speaker. Take breaks during long sessions and avoid automatically increasing volume with fatigue. Consistent conditions are more useful than continual unexplained changes.
Contents, budget and first setup
Count the required channels, cables, power arrangements, stands, controller and calibration equipment. Verify the sales unit and supplied items. For a shared studio, provide straightforward control and a saved working profile. For multichannel work, agree interface outputs and common control before buying individual monitors. Matching cabinets alone do not solve routing requirements.
At first use, check channels, wiring, unwanted noise and volume operation. Save settings and a diagram. Provide the supplier with listening distance, room layout, sources and tasks. Then try a familiar project and assess whether decisions become repeatable. Plan future inputs, outputs and space if a subwoofer or second pair is expected. Each additional component should solve a defined task rather than increase equipment count without practical need.
Include setup time and access in the budget. Documentation, a recoverable profile and inspectable connections simplify regular use. After changes, record what moved, what settings changed and the outcome. This distinguishes repeatable improvement from a passing impression and preserves useful conditions for the next project.
SoundsGood supplies sound equipment for educational institutions, studios, concert halls, conference rooms, and public and private organisations. A technical brief can be used to agree on system components, specifications, a commercial quotation, documentation and delivery arrangements.