Describe the journey before selecting protection
The same speaker or mixer may need different protection depending on its journey. Carrying equipment from a home studio to a car, repeatedly loading a concert system and handing an item to a carrier are different scenarios. Record who handles the device, whether there are stairs, how it sits in the vehicle and whether other items travel beside it. This establishes the required construction without assuming that every rigid enclosure is suitable for every journey.
Consider frequency of use separately. Equipment that remains indoors may need a cover that is quick to fit and easy to store when removed. Weekly touring puts greater emphasis on handles, closures, access and condition checks. Shared equipment benefits from clear identification and a repeatable packing arrangement. Select for the actual work rather than the impressive appearance of a product photograph. Small construction details often determine how convenient a bag or case will be over time.
Distinguish covers, enclosed bags and rigid cases
A slip-on cover may protect a cabinet during storage without providing a bottom or its own carrying handles. An enclosed bag holds equipment inside and requires checks of padding, fasteners and handle loading. A rigid case has a different structure, but its capabilities still depend on the exact model. Do not infer suitability for drops, stacking, rain or checked baggage without appropriate manufacturer confirmation. A general product name is not a substitute for a declared capability.
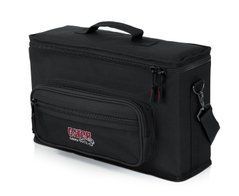
Compare the functions actually needed. For example, the manufacturer describes the Gator G-MIXERBAG-2118 as a padded mixer or equipment bag with a removable shoulder strap and external pockets. This illustrates useful selection criteria, but does not make that bag suitable for every mixer. Check dimensions, fit and protection requirements separately for the device being transported. Another product may provide a different arrangement even if its overall appearance is similar.
Measure the complete equipment envelope
Record width, depth and height in the position used for transport. Include handles, feet, protrusions, controls and components that remain attached. Do not measure only the main metal or plastic chassis. Photographs and a sketch of the widest sections can help with irregular shapes. Decide in advance whether removable accessories will stay fitted. Compare the resulting envelope with usable internal space, not the outside dimensions of the bag or case.
An excessively tight fit may press on controls, while too much unused space requires suitable retention. Do not assume loosely added fabric replaces a designed interior. Inspect the lid shape and the location of padding. During the first trial, check that closing the product does not press against a display, faders or grille. It should close as designed without forcing the equipment into a smaller space. Consider the full enclosure shape rather than just the dimensions of its base.
Protect mixers and DJ equipment appropriately
A mixer needs clearance above faders, encoders and connectors. Two consoles with the same channel count can have different bodies, so channel count is not a dimensional standard. For a DJ controller, also check jog wheels, protrusions and socket locations. If a separate protective lid is used, include its dimensions and compatibility with the bag. Do not assume the original fit remains unchanged after adding an accessory, even when that accessory is intended for the device itself.
Establish whether the equipment will be removed for use or whether the case is designed for operation inside it. In the latter situation, verify access to all required ports, ventilation and cable space. Removable panels and lids should be features of the product rather than improvised modifications. Do not run equipment inside closed transport packaging unless permitted. Assemble the full working arrangement before the first event, including a laptop and other items positioned nearby.
Organise microphones, receivers and accessories
Count every item that travels in a microphone kit: microphones, holders, receivers, transmitters, power supplies and cables. The number of positions should reflect more than the primary devices. Check the length and shape of each compartment, especially where different microphone bodies are involved. Do not leave hard accessories loose beside grilles or displays. Dividers help separate components, but their presence does not establish correct fit. Record which smaller items belong in separate pockets.
Identify component positions so that completeness is visible after an event. For wireless systems, preserve the association between transmitters, receivers and their accessories. Prepare batteries and moving parts for storage according to the equipment instructions. Do not seal damp items inside a bag. A separate organiser can help if it does not press on the main equipment or alter the designed closure. Check its position when fully loaded rather than assessing only the empty organiser.
Choose covers for speakers and bags for stands
Select speaker protection for the exact model or confirmed dimensions and shape. Handles, feet and connector panels may occupy different positions even on similarly sized cabinets. Check how the cover is removed and whether it provides access to the original handles. Do not lift a speaker using parts of a slip-on cover unless those parts are designed for carrying. Establish separately whether the bottom is protected and which transport arrangement the product supports.
Assess stand bags by folded support length, number of positions and total weight. Protruding threads and clamps should not damage adjacent items. Do not pack heavy bases with delicate electronics without a designed separation system. With several stands, evaluate not only capacity but also handling of the complete load. One large bag is not always more practical than several organised pieces, particularly when the equipment must be carried up stairs rather than rolled directly to the venue.
Rack height does not establish usable depth
For rack equipment, check the number of spaces, usable mounting depth and the required support for each chassis. Height in rack units does not establish whether a device fits with its connections. The Gator catalogue separately lists rack case options with different depths and front and rear rails. Compare the configuration actually needed rather than relying only on a matching unit count. Pay attention to where the stated depth is measured.
Check clearance to the lids, space for plugs and equipment ventilation requirements. Do not assume every part of the volume behind a rear panel is available for cables without inspecting the construction. Where a chassis requires additional support, follow its mounting instructions. Add the weights of all devices, the case and cabling. Before transport, inspect retention and lids; before operation, provide the required cooling and port access. Plan somewhere suitable to store removed panels during use.
Arrange padding and accessories deliberately
Dividers and padding should accommodate the equipment shape instead of creating accidental pressure points. Place hard power supplies and connectors away from sensitive surfaces. If the product has an adjustable insert, configure it as instructed and check the device position after closure. Do not fill every spare gap with heavy accessories simply because they fit. Compartment volume and permitted product loading are different questions. Consider how the contents sit after the case has been carried normally.
Create a repeatable packing layout. On location, this reduces searching for a power supply or cable and makes a missing component easier to notice. For shared equipment, keep a short inventory in an accessible compartment. Identify items that must travel separately. Revisit the arrangement after changing equipment: a new device may have different protrusions or require another orientation despite similar main dimensions. Familiarity with the previous layout is not evidence that it suits the replacement.
Evaluate handles, straps, wheels and total weight
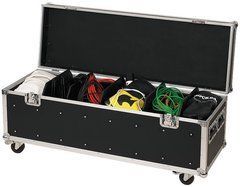
Calculate the weight of the complete package, including the protective product itself. An empty case being easy to carry says little about handling loaded equipment. Consider how many people are needed for loading, whether stairs are involved and the space available in the vehicle. For wheeled products, check the handle construction and suitability for the route against manufacturer guidance. Wheels help on suitable surfaces but do not eliminate every stage of manual carrying.
Establish which parts are intended for lifting. Decorative loops, fasteners and lid fittings should not replace designated transport handles. Position and secure equipment in the vehicle according to the transport conditions and product requirements. A rigid shell does not establish that arbitrary weight may be placed on top. If stacking is required, check an explicit manufacturer statement for the chosen model and the intended arrangement. Similar appearance does not transfer another case's loading capability.
Separate fabric properties from weather protection
A material's characteristics do not establish the performance of the complete product. A water-repellent surface does not confirm protection at seams, zips and handle attachments. If a defined environmental protection level is needed, seek the documented specification of the particular model. Do not assume an ordinary cover is sealed. Inspect the interior after use and dry the product by an approved method before closing it. Pack equipment in the condition specified by its own instructions.
Choose cleaning methods according to the materials and manufacturer recommendations. Aggressive chemicals or an unsuitable solvent can affect lining, coating or closures. Include seams, handles and locks in regular inspections. Do not compensate for a damaged handle by overloading another one. Separate the product until repaired or replaced. Store empty bags and cases so that unsupported loads do not deform them, and keep small removable parts associated with the correct product.
Check a new case before the first event
On receipt, compare the part number, supplied components and interior construction with the order. Trial-fit the equipment without forcing it into place. Check closure, handle access and accessory positions. Rack cases need a separate assessment of mounting and cable clearance. Do not postpone the first fitting until concert loading time. A dimensional mismatch is better discovered before planned use, when the correct alternative can be established without disrupting an event schedule.
Use a short checklist before each trip. After returning, inspect both the equipment inventory and the condition of its protection. A photograph of the correct packing layout can help different team members repeat it. Keep the model and dimensions on record so that replacement orders do not depend on approximate descriptions. If the vehicle or route changes, reassess whether the existing construction suits the new conditions rather than assuming the original selection remains appropriate.
Questions before choosing a bag or case
Is choosing extra space helpful? Only if the equipment can be retained correctly without pressure on vulnerable parts. Unused space alone is not an advantage.
Does a universal case fit every model? No. Check usable internal dimensions, shape, retention and the actual transport scenario.
What information helps with selection? Provide exact equipment models, dimensions including protrusions, total weight, accessories and the journey description. State whether operation inside the case is required and how frequently the package travels.
SoundsGood supplies sound equipment for educational institutions, studios, concert halls, conference rooms, and public and private organisations. A technical brief can be used to agree on system components, specifications, a commercial quotation, documentation and delivery arrangements.