
|
Quantity
|
Cost
|
||
|
|
|||
|
|
|||
What a replacement HF diaphragm does
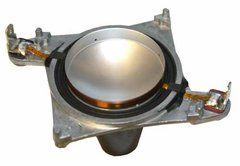
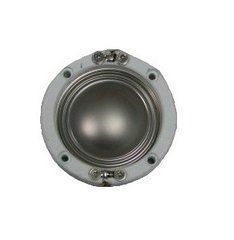
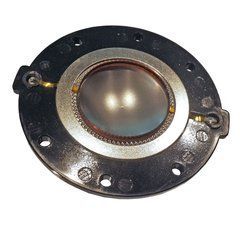
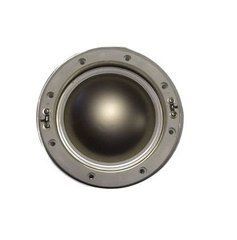
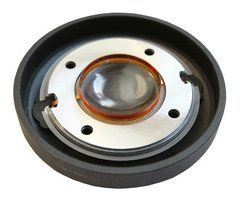
A replacement diaphragm restores a compatible high-frequency compression driver when its moving assembly is damaged but the remaining parts are serviceable. Depending on the design, a repair kit may include the membrane, voice coil, suspension, terminals, mounting parts or a rear cover. The manufacturer defines the contents. It is not necessarily a complete driver with a magnet assembly, and it is not a universal spare for every loudspeaker. Appearance alone is therefore an unreliable basis for selection.
The important identifiers are the exact driver model, electrical version and approved repair kit part number. The loudspeaker cabinet name may not be sufficient because different production versions can contain different components. For a repair intended to restore normal performance, begin with documented compatibility. Fitting a different diaphragm material in pursuit of an upgrade is a separate engineering decision. A correct service replacement restores the intended high-frequency section, including its relationship with the crossover and horn.
Identifying the correct service part
Record the complete marking on the driver, including model suffix, nominal impedance and revision where shown. Clear photographs of the label, terminals and mounting arrangement help with identification. Also provide the cabinet model and any previous repair history. A non-original part already installed in the driver is not automatically the right reference for another purchase. Its suitability may need checking, particularly if the loudspeaker's behaviour changed after an earlier repair.
A manufacturer's explicit part listing is stronger evidence than a general description of the series. Celestion specifications, for example, can list separate repair kits for different impedance versions of one driver. A shared family name does not remove that distinction. If the label is missing or the information conflicts, ask a service specialist to assess the photographs. Dimensions can assist identification, but they do not establish electrical and acoustic compatibility on their own.
Exit diameter is not voice coil diameter
Compression driver specifications can describe several diameters: the horn exit, voice coil and external components. These refer to different features. A one-inch exit does not define the size of the replacement coil. Relevant repair kit details include mounting geometry, alignment, hole positions, assembly height and compatibility with the phase plug arrangement. A component might appear to fit inside the housing while sitting in an incorrect working position. That is not a valid match.
Do not enlarge holes or trim parts to adapt an unrelated kit. Such alterations change the design and complicate later service. If a listing gives only a general diameter, obtain confirmation of the supported driver models. Compare the part number, impedance, contents and official application information together. Similar rear covers or terminal positions can conceal important internal differences. A service replacement needs to be confirmed for the driver, not merely capable of being fastened to it.
Impedance and crossover compatibility
The electrical version must match the intended driver. Changing nominal impedance affects amplifier loading and interaction with a passive crossover. It is not a suitable shortcut for adjusting the high-frequency level. A multimeter's DC resistance reading is not the nominal impedance stated in the specification. Resistance measurement can assist fault diagnosis, but it does not replace the factory identification or prove that an unknown coil is suitable for the system.
After repair, retain the recommended operating conditions: crossover frequency and slope, loading limits and protection arrangements. A new repair kit does not automatically increase the loudspeaker's power capability. In an active system, check the correct processing preset and signal routing. Bypassing filters or accidentally feeding an unsuitable full-range signal can damage a correctly selected replacement. Unless the original cause of failure is addressed, replacing the assembly alone may not provide reliable service.
Diaphragm materials and part provenance
The membrane material works with its shape, suspension, coil, magnetic system and acoustic loading. Its name is not a universal quality ranking. For routine repair, the priority is the construction specified for the exact driver. Substituting a different membrane to obtain an advertised improvement can alter output and integration with the other frequency bands. That is a system redesign question rather than a straightforward restoration of the original operating characteristics.
Distinguish an original service part from an aftermarket component advertised as compatible. Check its documented applications, provenance and return conditions before installation. Packaging photographs or membrane colour alone do not establish authenticity. For demanding live sound use, traceable parts and clear service support are valuable. This is particularly relevant when several matching cabinets operate together: an undocumented change to one high-frequency section can make consistent system alignment more difficult.
Diagnose the fault before ordering
Missing high frequencies do not always mean a failed diaphragm. The fault may be in wiring, a protection device, crossover, amplifier channel or processor settings. Check the complete signal path before purchasing parts. Do not connect a high-frequency driver directly to an unrestricted full-range amplifier signal as a quick test. Diagnosis requires appropriate filtering and controlled level. An unsuitable test can damage a working component and obscure the original cause of the problem.
A contaminated magnetic gap, distorted housing or damage to other components may make a diaphragm kit insufficient. A qualified technician should assess whether restoration is practical or a complete driver is needed. Describe the circumstances: a drop, a preset change, extended operation or a sudden noise. Fault history helps distinguish a cause from its consequence. Keep the old part until assessment is complete if its markings and physical condition are needed for identification.
Handling and installing the assembly
Follow the procedure for the specific driver construction. A clean work area matters because the gap is small and the magnet attracts metal particles. Avoid pressing the membrane or coil and do not rest the assembly on a surface that could deform it. Record part order, terminal position and orientation before disassembly. An active loudspeaker also contains power electronics, so internal access and repair are best handled by an appropriately equipped service technician.
Do not introduce arbitrary solvents, lubricants or additional adhesive. The manufacturer determines tightening requirements, assembly order and alignment method. Some repair kits integrate the rear cover; others provide a separate moving assembly. If the part cannot be seated without distortion, stop and verify the match. Forced assembly can damage even the correct replacement. A short demonstration for one product is useful context, but it is not a universal installation procedure for another model.
Checking the repaired loudspeaker
After assembly, check terminals, polarity, fasteners and the absence of loose objects. Begin listening at a low level with the proper filter in place. Assess unwanted noises, stable reproduction and integration with the other bands. Producing sound is not by itself proof of a completed repair. Professional applications benefit from measurements and comparison with a healthy system of the same version under identical settings. Immediate maximum-level testing is not a substitute for this process.
Matching cabinet enclosures do not guarantee matching output after service. For a stereo pair or an array, compare the installed part numbers and test results. There is no need to replace healthy parts without a reason, but documenting the system is worthwhile. Record the repair date, driver model, replacement part and checks performed. This helps with subsequent maintenance and the selection of touring spares. Keep spare assemblies in protective packaging so transport does not distort fragile components.
Preparing a useful service request
A clear request brings together the cabinet name, driver label, impedance version and close photographs of the mounting area. State whether the component has already been removed and whether any non-original parts were previously fitted. Describe the symptom without assuming its cause: no high-frequency output, intermittent operation or unwanted noise are more useful starting points than an unsupported diagnosis. This information helps the supplier or technician separate part identification from the repair assessment.
Check what the selected package actually contains before arranging installation. A kit that omits a reusable cover is not necessarily incomplete, while another design may require a supplied integrated cover. Follow the intended construction rather than mixing old and new parts by appearance. Keep purchase documentation and the packaging label with the service record. These details make a later repeat order much easier and reduce the risk of selecting a visually similar but electrically different version.
Frequently asked questions
Is diameter enough to choose a kit? No. The exact model, electrical version and approved part number are required. Horn exit diameter and voice coil diameter describe different parts.
Can I use another impedance? Routine repair restores the specified version. A change requires engineering assessment of the complete system, including the amplifier and crossover.
Does the kit include a magnet? A replacement moving assembly is normally different from a complete compression driver. Confirm the contents of the particular product listing.
Where can I see a manufacturer's example? The Celestion diaphragm replacement article illustrates its approach for the relevant designs. Do not apply that procedure automatically to unrelated models or brands.