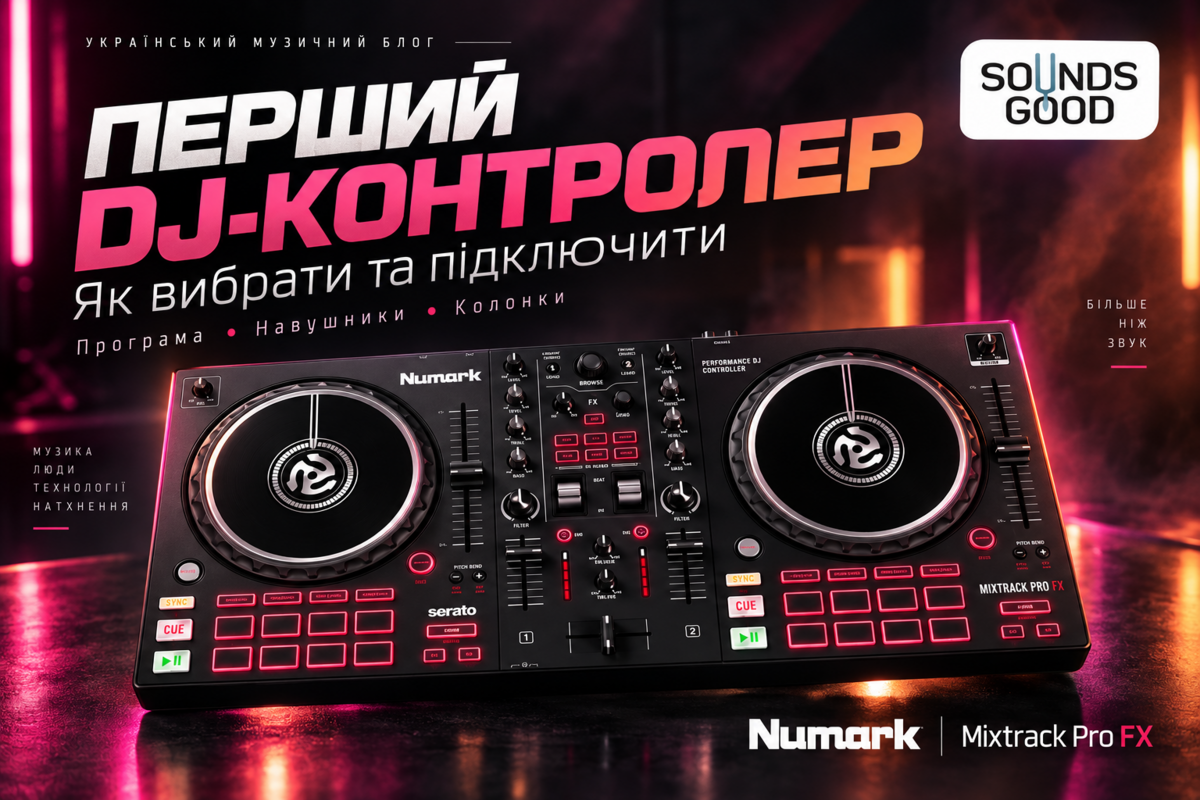
Choose your first DJ controller around the way you intend to practise and perform, rather than the number of illuminated buttons. One person needs a compact device for preparing music beside a laptop. Another wants generous control spacing for daily exercises. A third would prefer to play without a computer and keep a library on removable storage. The price of the controller is only part of the decision: software, headphones, speakers, cables and music preparation all affect the finished setup. Without planning these parts, even a suitable model can become frustrating on the first evening. This guide explains computer controllers versus standalone systems, headphone cueing, connections, licences, library preparation and used equipment checks. Numark DJ2GO2 Touch, Mixtrack Pro FX and Mixstream Pro+ illustrate three different approaches. Product capabilities are based on manufacturer documentation; the buying advice is a practical decision process, not a claim that we conducted a comparative hands-on test. The objective is a dependable setup that makes regular practice straightforward.
1. A controller does not necessarily work on its own
A conventional DJ controller operates software running on a computer or another compatible device. Its buttons, faders and jog wheels send commands, while music playback and processing depend on that software system. A built-in audio interface provides outputs on the controller, but does not automatically turn it into a standalone player. A standalone system has its own environment for working with music without a laptop in its main operating mode. Your first decision is therefore whether you want a computer involved in every session. If you already own a suitable laptop, a conventional controller can be a convenient starting point. If you must buy a computer as well, compare the complete cost against a standalone setup. A large screen or USB socket alone does not establish how a device works. Follow the manufacturer's documented route from music storage to audio output. That route explains which additional equipment you actually need. Consider the physical arrangement too: the computer, headphones and cables should fit comfortably without reducing the controller to a precarious position on the edge of a desk.
2. Choose the software and hardware as a pair
DJ software shapes library organisation, track analysis, cue points and access to particular features. Assess the controller and application together. Check official support for the exact model, the required edition and the activation method. MIDI capability does not mean every controller provides complete, convenient access to every application. Custom mapping can sometimes help, but it takes work and may not reproduce official integration. For a first setup, a clear supported installation route and accessible instructions are valuable. Look at loading tracks, changing a playlist order, setting a cue and configuring headphone monitoring. If these routine actions feel awkward, extra effects will not solve the everyday problem. Also consider equipment you may use later: investigate library and preparation-data transfer before investing heavily in a particular workflow. You do not have to choose an application for life. You do need to understand its limitations and preserve your original music in an organised structure. That makes a later change more manageable than trying to reconstruct a collection from scattered downloads and missing folders.
3. Check current laptop compatibility
An older controller page may list operating systems current when the product launched. Those details are not necessarily the right guide today. Check the present software requirements, operating-system support and hardware support separately. Processor, memory, available storage, ports and stability with your intended features all matter. Meeting minimum requirements does not promise equally comfortable performance with every demanding function. Before buying, install the official application where possible, open local tracks and assess basic navigation. Ideally, test the controller with your own laptop. Do not leave adapters until the last moment: the computer's ports may differ from the supplied cable. A working connection requires a data-capable cable, not merely a charging lead. Preserve a stable configuration and avoid major changes immediately before a planned performance, when there is no time to test the complete system again. Think about power and cable placement as well. A dependable setup should survive an ordinary practice session without repeatedly reseating plugs, looking for a spare port or investigating an unexpected compatibility issue.
4. Two channels are often enough for learning
You can learn the essential skills on two decks: select the next track, match its timing, find the right entry point and make an understandable transition. More controllable decks support particular techniques, but do not replace those skills. Distinguish software decks, physical mixer channels and external audio inputs, because their numbers do not always match. A controller may switch between software layers without providing a separate full set of faders for each one. It may also be unable to operate as a standalone mixer for external players. If you intend to add sources, confirm the actual inputs and operating modes. For a first purchase, comfortable control of two main tracks is usually more informative than paying immediately for a complicated future scenario. Set a concrete first-month objective, such as several clean transitions between familiar songs. The equipment should support that objective without burying it under unnecessary switching. If additional decks later become necessary, you will be able to identify the simultaneous actions you need and the specific limitation preventing them.
5. Pocket-sized control and its compromises
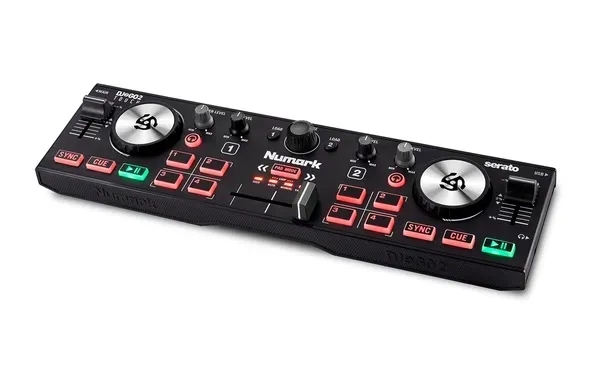
A compact controller is easy to carry, keep beside a laptop and use for preparation. Numark DJ2GO2 Touch offers touch-capacitive jog wheels, a built-in sound card, separate master and headphone outputs, and Serato DJ Lite support. However, its small panel does not reproduce the spacious, fully equipped mixer section found on larger devices. Assess which operations you can perform without returning to the screen. If frequent equalisation changes and fine fader movements are central to your practice, compact dimensions can become a limitation. That does not make the device poor; it means it solves a different problem. Check whether your hands can reach the wheels, buttons and controls without accidental touches. Imagine half an hour of ordinary practice, not only the journey to the venue. Small size can be excellent for playlist preparation, while roomier controls may suit sustained learning better. Let the dominant use case decide. Check cable reach and desk stability too, so the lightweight device does not slide around or hang from a tight connection whenever you move your hands.

6. A larger panel for regular practice
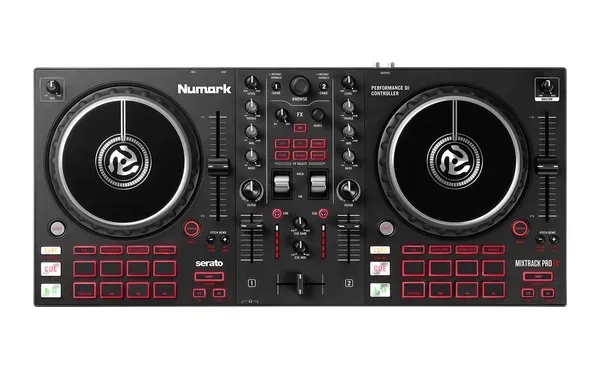
Numark Mixtrack Pro FX illustrates a computer-based controller with more room devoted to physical operation. The manufacturer specifies two decks, six-inch capacitive-touch jog wheels, three-band EQ, filters, performance pads, effects control, a microphone input, and speaker and headphone connections. Translate those features into practical movements: small tempo corrections, bass adjustments during a transition and returning a fader to a repeatable position. A larger enclosure is not automatically more professional or better at everything. It occupies more space and needs a suitable surface. Nevertheless, control spacing can matter more than minimum weight during daily sessions. Position the device at the height you would actually use and assess your posture. If you constantly bend down or reach awkwardly towards the laptop, solve the workspace arrangement first. Comfort depends on the complete setup rather than the controller dimensions alone. When comparing devices, perform the same exercise on each. Repeated actions reveal differences in precision more clearly than casually pressing every illuminated button during a brief demonstration.
7. Standalone operation without a laptop
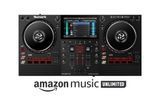
Numark Mixstream Pro+ uses Engine DJ for standalone operation and includes a screen, built-in speakers and the music-source capabilities described by the manufacturer. This creates a different setup from a small controller next to a computer. However, standalone does not automatically mean battery-powered, and built-in speakers do not replace every sound reinforcement system. Check the power arrangement and capabilities of the exact version rather than borrowing specifications from Mixstream Pro Go or another model. For home practice, an integrated screen and straightforward local listening can reduce setup time. Performance still requires a planned output route, monitoring and a dependable library. Try finding a song, browsing a playlist and preparing the next track directly on the device. An integrated screen has its own workflow, which deserves the same scrutiny as a computer application. A higher purchase price is justified when this format genuinely simplifies your intended sessions. Remember that organising music and making backups remain separate tasks even if the laptop is no longer present while you perform.

8. Independent headphone cueing is essential
A DJ needs to hear the next track before the audience does. The master output and headphone path must therefore follow a correctly configured routing arrangement. Do not confuse the deck Cue button that returns to a playback point with the channel-selection control used for headphone monitoring. Similar labels can describe different jobs. A simple test is to play the first track through the speakers while keeping the second closed to the master output. Enable headphone monitoring for the second and confirm that only you hear it. Then check the blend between the prepared signal and the master, where that function is provided. Start with low headphone volume. If every output carries the same thing, inspect the selected audio device, output assignments and monitoring buttons. An ordinary splitter that duplicates one signal does not create independent cueing by itself. Learn this routing before attempting complicated transitions. Otherwise, it becomes difficult to distinguish a timing mistake from a fader position or audio configuration problem. Repeat the check after disconnecting and reconnecting the equipment.

9. Choose headphones for control, not bass alone
Clear attacks, comfortable fit and intelligible rhythmic detail matter more for learning than simply producing a large amount of bass. Check plug size, adapter security and cable length. A cable that obstructs the faders or pulls tight when you move can undermine an otherwise good listening experience. Wear the headphones for something resembling a normal practice period rather than a few seconds. Monitoring with one ear or both depends on habit and situation; copying another DJ's stage posture is not a necessary starting point. First learn to distinguish the incoming track from the current mix reliably. For timing-sensitive work, a predictable wired route is usually the simplest foundation. Do not assume a domestic wireless headset is equivalent to headphones connected to the controller. Check delay and access to the required cue path across the whole system, not merely whether pairing with a phone succeeds. Volume adjustment should also be understandable and easy to reach. Accidental changes should not repeatedly force you to interrupt an exercise or remove the headphones abruptly.
10. Match the speakers to the main output
Before buying, inspect the inputs on your speakers and the outputs on the controller. Powered speakers require an appropriate line-level signal; passive speakers need a separate amplification stage. These are different connection plans. Write down the exact connectors and cable distance before selecting leads. A physical adapter between plugs does not by itself establish that every device is correctly matched. For home practice, build a simple wired path first and test it at moderate volume. If using one speaker, follow the recommended mono connection method so that part of the signal is not lost. Do not join two active outputs with an improvised cable. Longer venue runs deserve a separate check of suitable outputs and compatibility with the sound system. Begin with low levels and raise them gradually. The objective is clean, controllable sound rather than simultaneously testing the maximum output of every component. Keep the relevant level controls accessible as well; they should not be hidden behind furniture or trapped beneath taut cables when an adjustment becomes necessary.

11. Red meters are not a target
Channel gain, channel faders and the master output serve different purposes. Running every control high reduces room for louder moments and can introduce unwanted overload. Use the meters and software guidance while listening to the result. Compare perceived musical level, not just knob positions. Two files may have very different loudness and density, so matching control positions does not guarantee a smooth transition. Practise introducing the next track without a sudden level jump. Do not compensate for poor headphone audibility by raising the master output; investigate the headphone route first. If an indicator shows overload, identify the stage responsible instead of only turning down the speakers. Reducing level at the end may not remove distortion already created earlier. A useful habit is to preserve controllable headroom and hear what changes during a blend. Where recording is available, listen back after the exercise. Sudden jumps that escaped notice while operating two tracks often become obvious when you can concentrate entirely on the finished sound.
12. Jog wheels and tempo faders in practice
Jog-wheel size is not a standalone quality score, but it affects the feel of an action. Check the response of the top surface and edge, available modes and sensitivity options where provided. For a beginner, a small temporary timing correction is a useful exercise before attempting elaborate scratching. Judge a tempo fader by how easily you can make the required adjustment within the selected range. A short travel can demand finer movements, while a larger enclosure takes more room. Repeat the same exercise across devices without changing the tracks or essential settings. Notice accidental contact with adjacent controls. If the controller uses layers, check whether the currently controlled deck remains obvious. Good control layout lets you focus on listening instead of constantly watching your hands. That is more useful than an impressive photograph of the jog wheels. Avoid deciding from one touch alone: repeat modest corrections and see whether the intended movement can be reproduced without continuously compensating for your own over-adjustment.

13. Sync is useful but does not fix everything
Automatic synchronisation can support both learning and performance, but it relies on analysis data and the relevant settings. An incorrect beat grid can produce an unexpected result. Listen to percussion and phrasing rather than relying exclusively on matching tempo numbers. Begin with tracks that have a clear, steady rhythm, verify the downbeat and try several transitions. Then make small manual corrections to understand the connection between an action and the sound. Choosing a controller need not become an argument about whether one button is acceptable. Understanding what it does and recognising an incorrect outcome are more useful skills. Alternate exercises with and without assistance. Automation then becomes a tool rather than the only way to maintain a transition. Prepared music and attentive listening remain necessary regardless of the number of visual aids. If synchronisation behaves differently than expected, revisit the source analysis and configuration before assuming that the controller is broken or that your physical timing is the sole problem.
14. Pads, cue points and loops
Pads provide quick access to functions, but their number does not explain how they operate in a particular application. Inspect the modes, labels and switching method. Start with a few understandable launch points and a short loop to help prepare a transition. It is not enough to press a button: know where playback will continue and what the master output will carry. Name or position stored markers consistently where the system allows. One location might identify a convenient introduction, another an important section of the song. Do not fill every available slot merely because it exists. A few dependable markers are more useful than numerous accidental ones. Check that they remain correct after reloading a track and transferring a library. During device comparisons, assess how easily an incorrect action can be undone without stopping the session. Returning clearly to normal operation makes learning calmer. Give each loop exercise a purpose, such as gaining preparation time, and listen for whether the repetition still makes musical sense.
15. Effects cannot replace a good transition
Reverb, echo, filters and other processing can emphasise a musical moment, but they do not automatically repair an unsuitable track or entry phrase. First make transitions without effects while controlling level and low frequencies. Add one process and identify what actually improves. Check activation, intensity and the route back to the starting state. A forgotten filter or excessive tail can interfere with the next song. Clear indicators and accessible controls matter more on a first controller than the longest list of effect names. A process that can be applied at the right moment is more practical than dozens hidden in an awkward menu. Record a short section where supported and listen later when your hands are free. It is easier then to hear whether the treatment supports the musical structure or merely distracts from it. After each early exercise, return settings to a known position. This makes comparisons meaningful and helps separate the influence of processing from changes in level or timing.
16. Start with a dependable local library
A small collection of local files that you are entitled to use in your intended scenario is a convenient foundation. Confirm supported formats, useful filenames and intact files. Thousands of unfamiliar tracks are not the best starting point. A few dozen well-known songs make it easier to recognise structure, useful entry positions and differences in loudness. Organise playlists by musical purpose rather than download date alone. Allow the application to complete necessary analysis before practice and verify the result by ear. Back up both music and preparation data using the system's supported procedure. The audio folder and marker database may be separate parts of the setup, so copying music alone does not always preserve all your work. If removable storage is involved, test it on the intended device in advance. A reliable small library is more useful for learning than a vast untested archive. Make time to learn newly added tracks: understanding a composition contributes more to an intentional transition than immediately increasing the number of songs available.

17. Check the complete streaming workflow
Music-service support depends on the application, hardware, version, region and account conditions. An old promotional list is insufficient. Confirm the required subscription, availability in your country, internet needs and restrictions affecting recording or other features. Listening in a consumer application does not automatically give a DJ system access to the same collection. For an important performance, prepare a supported fallback for connection problems within the relevant usage conditions. Do not test the arrangement for the first time at the venue. Prepare the required material through permitted methods and check searching, analysis and playback beforehand. Streaming can be convenient for discovering music and practising, but it needs to fit a dependable setup. Establish exactly what can be saved and transferred: temporary availability inside an application does not necessarily mean that an ordinary local audio file exists. If a feature is essential, verify it with your account and chosen equipment. A demonstration using a different program does not fully establish that your intended route works.
18. Microphones and additional sources
For announcements or event work, check the microphone input, connector type and available controls. Do not assume that a microphone automatically reaches a computer recording or livestream simply because it is audible through the main output. Routing can differ and needs confirmation for the actual system. Similarly, USB does not imply support for every storage device or external player. An extra source needs a suitable input and supported operating mode. Make a short task list: laptop music, voice, backup source and recording. Identify the connection for each. If a microphone is only occasionally necessary, compare an integrated solution with a separate route without complicating the whole setup unnecessarily. Before performing, test speech at moderate level and agree who controls it within the sound system. This reduces unexpected volume changes during a set. If you expect the microphone to work with the application closed, test that particular state. The presence of a physical socket alone does not describe every condition under which it operates.

19. Verify mix recording before purchase
Recording depends on the software, edition, music source and signal route as well as the controller. A record button in someone else's video is not proof that it is available in your configuration. Read the official description and make a short test. Open the resulting file separately and listen to confirm that it contains the intended signal. Check level, beginning and ending, and microphone presence where required. For learning, short recordings are often more useful than accumulating long sets that never get reviewed. Select one transition, listen and define a specific next exercise. If the software or source restricts recording, do not rely on an unverified workaround. Choose a supported workflow that matches your needs. Give the file a clear name with the date and practice objective. After several weeks, this makes it possible to compare the same skill over time. Progress then rests on observable changes rather than the impression left by the most recent successful transition.
20. Buying a used controller
Inspect connectors, enclosure, faders, knobs and jog surfaces. Wear does not necessarily indicate a fault, but liquid damage, unusual repairs and unstable connections need attention. Connect the unit to a compatible system and test every function you will use. One playing track does not establish that the headphone output, second channel or microphone route works. Check smooth parameter changes and unwanted jumps. Clarify actual software-licence conditions instead of assuming that another person's account or paid access transfers automatically. Confirm the exact model and included accessories. Similar generations can differ in support for current software. Establish testing and return arrangements before payment. If every problem is attributed to a future update, ask for understandable evidence of present operation. A worthwhile purchase should let you start learning rather than spend the first month finding a cable, driver or repairer. Compare the final cost after necessary additions against other options: an attractive device-only price may lose its advantage once a complete working setup has been restored.
21. Budget for the complete setup
Include the computer or compatible mobile device, headphones, speakers, cables, possible software costs and a usable surface. You may already own some items, but verify their suitability. Do not compare a standalone system with a conventional controller while omitting the laptop cost. Equally, quiet home practice does not require buying powerful event speakers immediately. Separate what is necessary now from what becomes relevant after a specific need appears. Transport protection for controls and space for cables are useful, but the solution should match how often you travel. Keep a modest reserve for a compatible accessory whose need becomes clear during testing. A transparent budget helps you buy a functioning setup rather than the most expensive individual box. If the available money covers the device but leaves no practical way to monitor and practise, reconsider the balance. A simpler controller with comfortable headphones and dependable connections can support more frequent sessions than an elaborate model surrounded by an incomplete or awkward workspace.
22. Your first test after unpacking
Start with the manufacturer's recommended connection and official application. Prepare two local tracks, reduce output levels and test the left and right decks separately. Configure the main output and headphone cueing next. Confirm that buttons, wheels and faders change the intended parameters. Avoid adding external processing, streaming, wireless speakers and complex extra routing immediately. Establish one reliable basic workflow first. If something fails, note the exact symptom and the last action taken. Check the cable, selected audio device, channel state and software support in a logical order. Once the basic setup works, save relevant settings and write a short startup sequence. This is especially useful when several people share the equipment. Repeat the procedure from the beginning: a dependable result should be reproducible, not the product of a lucky button sequence. Include closing and reopening the application so you discover any settings that need selecting again before they interrupt an actual practice session.
23. A sequence for your first lessons
First learn to load tracks, start playback and control level confidently. Next, practise independently monitoring the upcoming track and choosing an entry point. Add tempo matching, phrasing and simple frequency adjustments afterwards. Trying every pad mode and effect simultaneously makes progress harder to assess. Choose one objective and a few familiar songs for each session. Afterwards, briefly note what worked and what deserves repetition. If recording is supported, use small excerpts for feedback. Judge musical suitability as well as technical accuracy. Knowing when to let a song play without extra intervention is part of DJ work too. A useful first controller helps you learn these skills in sequence. Its value depends on regular practice and understandable progress, not the number of unexplored functions. Change one variable at a time. It then becomes clearer whether an improvement came from a more precise entry, better level adjustment or simply choosing a more suitable next track.
24. Make the final choice around a working routine
Return to three questions: which device and software will you use, how will you monitor the master and incoming signals, and which actions will you perform most often? A compact format supports portability and simpler tasks, a spacious panel supports comfortable daily control, and a standalone system supports an appropriate laptop-free workflow. No category is automatically right for every beginner. Before paying, complete at least one transition through your intended signal path and verify the required connections. Write down additional costs and confirm compatibility. The purchase then becomes a way to practise regularly rather than a promise that one box will create professional results. If the setup starts easily, makes both tracks clear and allows repeatable exercises without technical obstacles, it already provides a sound foundation. Keep the tested configuration and early practice recordings. Later, they will help you assess an upgrade against real limitations instead of the appeal of another impressive product photograph.