



|
Quantity
|
Cost
|
||
|
|
|||
|
|
|||
XLR-to-jack adapter cables for compatible audio equipment
An XLR-to-jack cable connects compatible audio devices that use different connector formats. It may link a microphone to a suitable input, an interface line output to a powered speaker, or a mixer to a processor. However, the phrase “microphone adapter cable” does not mean any microphone can connect successfully to any jack socket. Check signal level, contact assignment and the function of both ports before selecting an assembly.
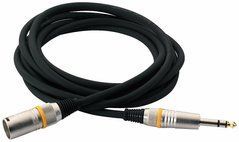
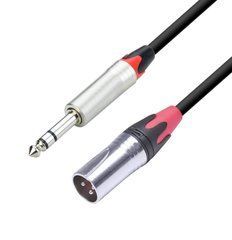
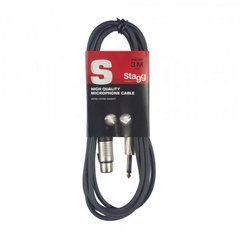
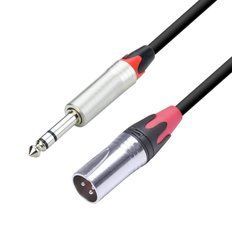
SoundsGood lists ROCKCABLE, ABCCABLS and Stagg options in different lengths, with male or female XLR connectors and 6.3 mm jack plugs. The selection includes TS and TRS models, which have important electrical differences. Begin with the equipment names and panel details, then compare the exact cable model against the required connection. If an essential wiring detail is absent from the listing, do not infer it from the brand or housing colour.
Choose the correct XLR mating connector
A male XLR has contact pins, while a female XLR has the corresponding sockets. The connection requires matching opposite parts. A typical microphone with a male XLR output takes a cable with a female XLR end, but the actual equipment port should still be checked. This category also includes male XLR cable ends for other connections, so the word microphone in the category title does not determine the required gender.
Confirm the contact count and locking arrangement. A conventional analogue audio line is not equivalent to every device using a circular multipin connector. Adding a gender adapter changes mechanical fit without changing the purpose of an output or input. If the ports are electrically incompatible, physically joining them will not solve the problem. A direct assembly of the right type is usually easier to organise and troubleshoot than a chain of unidentified adapters.
Understand TS and TRS before choosing a jack plug
TS has two contact sections; TRS has three. In an appropriate analogue connection, XLR–TRS can carry one balanced mono signal. XLR–TS normally serves an unbalanced arrangement where the connected devices support that wiring. The extra TRS contact does not automatically mean stereo. It may carry the right channel in headphones, the second signal conductor in a balanced line or the return path of an insert.
Do not connect an XLR–TRS assembly to a stereo headphone output expecting it to perform correct mono summing. Similarly, a mixer's insert socket is not an ordinary balanced output simply because it accepts TRS. Read the port label and manual description. Selecting “6.3 mm jack” without identifying TS or TRS and the socket's function leaves the most important compatibility question unanswered, even when the plug diameter is correct.
Balanced operation depends on the complete connection
A balanced connection needs a suitable output, input and correctly wired cable. Fitting TRS to an unbalanced source does not make that source balanced. XLR is not a universal guarantee either: a port may have another function or signal level. For a longer route between compatible line-level devices, preserve the balanced connection intended by their manufacturers rather than replacing TRS with TS without a reason.
When connecting a balanced output to an unbalanced input, treatment of the second signal contact depends on the output circuit. Do not apply an arbitrary contact-shortening scheme to every device. Where a manufacturer recommends a particular transition, compare it with the finished cable's wiring. Clarify compatibility if it is not documented. Two cables with the same external connector combination can have different internal connections and may not be interchangeable.
Microphone, line and instrument levels
A microphone signal normally needs preamplification. A mixer or interface line output has different operating characteristics, while a passive guitar input may require a Hi-Z mode. An ordinary cable does not automatically convert between those conditions. Connecting a microphone to a line input without the necessary gain will not become a satisfactory recording path simply by replacing XLR with a jack. A connector transition is not a microphone preamplifier.
The reverse case also needs attention: do not feed a strong line output into a sensitive microphone path without checking its mode, supported level and gain setting. On a combination socket, XLR and jack connections can have different sensitivities or use different internal paths. Mic, Line or Instrument selection and the device's specifications matter more than physical plug fit. Record the expected level at each end before connecting unfamiliar equipment.
Phantom power when using an adapter cable
Check whether phantom power is enabled at the input and whether the source is designed to accept it. Do not apply it to equipment that is not intended for that voltage. Sound Devices specifically warns about the risk to unbalanced outputs. An ordinary XLR–TS cable is not an isolator and does not protect a keyboard, player or other output from unwanted DC power arriving from a microphone preamp.
If a microphone requires phantom power, establish exactly which input connection supplies it on the mixer or interface. Do not assume the jack portion of a combination input supplies it in the same way as the XLR portion. Use the connection supported by the equipment or an appropriate dedicated device where needed. Reduce monitoring level before repatching and follow the equipment's recommended connection sequence to avoid abrupt noises.
Length, shielding and mechanical support
Choose the length for the real route, with enough allowance to reach both panels comfortably but without unnecessary loops. The category includes short one-metre leads and longer options, including ten-metre ROCKCABLE assemblies. Availability of a long cable does not establish that every unbalanced source can use that distance successfully. Consider the source, receiving input, interference environment and the signal transport method recommended for the equipment.
Shielding does not correct a wiring error or repair a damaged contact. Inspect the jacket, connector housings and cable exit protection. Leave room to operate the XLR latch and support hanging cable so its weight does not pull on the socket. For portable systems, clear labels and an easily substituted tested spare are useful. Multiple adapters add mechanical joints and make locating an intermittent contact more complicated.
Examples based on actual equipment roles
For an interface with balanced TRS line outputs and a powered speaker with a compatible XLR input, choose the appropriate XLR gender and confirm the speaker's line-input mode. A dynamic microphone with an XLR output feeding a suitable microphone jack input requires another XLR orientation and a verified wiring arrangement. Do not transfer a cable choice from one example to the other merely because both descriptions contain XLR-to-jack.
A long connection from an unbalanced TS keyboard output to a mixer XLR input may call for a DI box or another suitable interface rather than a passive cable alone. If the keyboard already offers an appropriate balanced output, the approach is different. A stereo headphone output requires correct channel separation or summing. A single mono-signal assembly does not automatically perform that task and can produce an unexpected result.
Check the connection before increasing the level
Compare port labels, input settings and the cable model before passing audio. Check full plug insertion and the XLR latch. Start at a low level and watch overload indicators. If the signal is unusually quiet, do not immediately increase every control. First establish whether a microphone output is feeding a line input or whether the wrong input mode is selected. A level mismatch is not reliably fixed by turning up any available gain control.
If hum or intermittent audio appears, check the source, cable and destination in sequence, changing one item at a time. Do not disconnect protective mains earth as a noise remedy. Test a suspect cable separately with the equipment disconnected. Label its XLR gender, TS or TRS format and length for storage. This helps prevent similar-looking assemblies from being mixed up after a show and makes a known working arrangement easier to restore.
Information to prepare before ordering
Write down the exact device models, the names of the ports being connected, required length, XLR gender and jack type. For a combination input, include its selected operating mode and expected signal level. Unusual connections also need a contact diagram. These details allow a specific product to be checked instead of selecting an approximate “microphone adapter” from one photograph. The wiring section of the equipment manual is particularly useful.
Compare ROCKCABLE, ABCCABLS and Stagg using confirmed details for the selected item. Do not assign the same materials, wiring or purpose to every model from a brand. When physical adaptation fully solves the task, a ready-made cable is straightforward. Where gain, isolation, impedance matching or summing is required, choose equipment that provides that function and the appropriate cables around it. A clear signal path is easier to maintain and diagnose.
Frequently asked questions about XLR-to-jack cables
Does XLR–TRS carry stereo? In a typical balanced audio line, it carries one mono signal. Contact functions depend on the ports and the wiring arrangement, not just the connector shape.
Will an adapter amplify a microphone? An ordinary passive assembly does not replace a microphone preamp and does not automatically convert operating levels.
Can phantom power remain on? Only where compatibility of the source and complete arrangement is explicitly established. Do not assume an unbalanced output can tolerate it.
The basic formats are discussed in Yamaha's audio interconnection guide, while power-related limitations are covered by Sound Devices' phantom power guidance. Verify the final connection against the instructions for your own equipment models.