SOUNDSGOOD / STUDIO NOTES
Between the compact 305P and larger 308P lies a useful middle option. The JBL 306P MkII combines a 6.5-inch format with the series architecture and practical tools for setting up a permanent workspace.
Specifications in context
| LF / HF drivers | 6.5″ / 1″ |
|---|---|
| Amplification per enclosure | 56 + 56 W |
| Frequency response | 47 Hz – 20 kHz (±3 dB) |
| Maximum peak SPL | 110 dB |
| Dimensions H × W × D | 361 × 224 × 282 mm |
| Weight per enclosure | 6.1 kg |
| Inputs | XLR / 6.35 mm TRS, balanced |
| Tone controls | Boundary EQ: 0 / −1.5 / −3 dB; HF Trim: −2 / 0 / +2 dB |
Why consider the middle model?
The 306P suits a musician working regularly and building a permanent mixing position. It is larger than the 305P yet takes less enclosure space than the 308P. Arranging, electronic production, video editing and home recording are sensible applications when the stands and room allow a symmetrical setup.
Middle-sized does not mean universally best. If a desk cannot accommodate appropriate spacing, a larger cabinet can make placement worse. Measure the workspace, allow for rear connectors and establish the listening position before comparing acoustic capabilities. The most useful specification may initially be the enclosure footprint.
Design and low-frequency balance
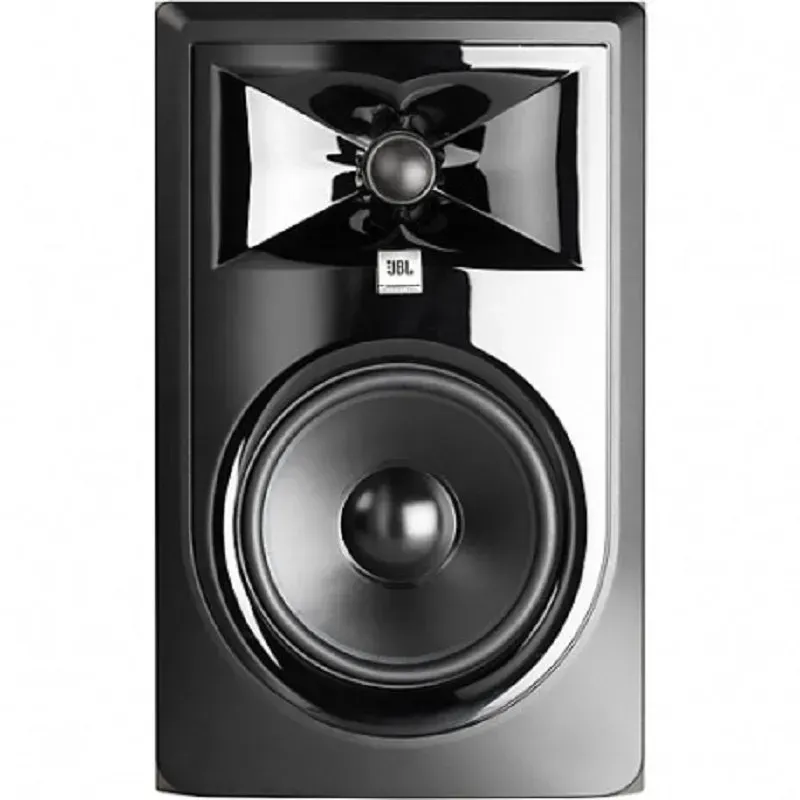
The 306P MkII combines separate LF and HF amplification, a rear port and placement-related tone controls. Its 6.5-inch woofer operates in a larger enclosure than the 305P. This is a different engineering compromise between size, bandwidth and available output, not a guarantee that every bass-heavy mix can be assessed without a second reference.
Pay attention to note decay. If some low notes seem to remain in the room longer than others, the room itself may be responsible. Changing speakers without changing placement can transfer the same problem to the new system. Compare the bass line through headphones and try a slightly different chair position before reaching for a plugin.
Reading specifications without misreading the sound
A response specified within ±3 dB and a range measured at −10 dB answer different questions. The first describes a relatively even operating band; the second tells you how far an already attenuated signal extends. The lowest number is therefore not a promise of full-level sub-bass. What matters at work is whether you can compare adjacent bass notes reliably, rather than merely detect the lowest one.
Maximum SPL is not a suggested daily listening level. Peak and continuous ratings use different conditions. Compare recordings at the same moderate level: the louder option can seem more convincing even when its bass or treble is excessive. This editorial review does not claim independent laboratory measurements; its application advice follows the design, manufacturer documentation and practical monitoring workflow.
Image Control Waveguide and the stereo picture
The 3 Series MkII tweeter sits within the sculpted Image Control Waveguide. This manages radiation and the transition between drivers to provide a useful listening area for stereo monitoring. In editing, that supports judgements about voice position, instrument panning and reverb tails. A generous sweet spot cannot, however, compensate for a speaker squeezed into a corner or an asymmetric desk.
Check the centre image with a mono voice recording. It should appear between the speakers. If it pulls to one side, check ear-to-speaker distances, matching controls and reflections from nearby surfaces before blaming the recording balance. Assess width with several familiar pieces, including sparse material, rather than one impressive demonstration track. Listen for stable positions instead of width alone.
Placement first, equalisation second
Place the pair upright on stable supports, approximately symmetrical around the listening position. Aim the high-frequency drivers towards ear level; begin with similar distances between the speakers and from each speaker to the listener. Move screens and other objects that obstruct the direct sound. Stands help establish height and orientation, but cannot fix room acoustics by themselves.
Leave breathing room behind the rear port instead of pressing the enclosure against a wall or hiding it in a tight shelf. Nearby boundaries can reinforce bass, while reflections can create frequency-specific cancellations. Move the pair in small increments and compare from the same seat. Applying a large EQ boost at an acoustic null generally consumes headroom without fixing the cause. Check placement before assuming the speaker needs a tonal correction.
A useful order for Boundary EQ and HF Trim
Begin with both tone controls neutral. Boundary EQ reduces low-frequency output when placement near a surface makes it excessive; HF Trim adjusts the top end. Change one parameter at a time and note the result. If reducing bass makes speech more natural but individual bass notes still vary dramatically, revisit placement rather than continuing to turn controls.
Build a short reference playlist containing a dry voice, an acoustic instrument, a dense production and a moving bass line. After adjustment, play it quietly and at the normal working level. Avoid tuning the whole system around a single recording. You want a dependable reference that reproduces the same balance tomorrow, and you should be able to explain why each change improved your decisions.

Connecting an interface and establishing a daily workflow
Feed the left and right line outputs of an audio interface to the corresponding speakers. Balanced TRS or XLR wiring is useful when the complete signal path supports it. Each monitor TRS input carries one channel; it is not a stereo socket for both speakers. Connect a guitar or microphone to an appropriate interface or mixer input rather than directly to a monitor line input.
Start with low levels, set both speakers to the same sensitivity and raise the source gradually. A common interface volume control is more convenient for daily use than changing rear-panel controls independently. If you hear hum, inspect the source and cabling while keeping protective earth intact. Turning down the speakers cannot restore a signal that has already clipped earlier in the chain.
Checking a mix and planning the next upgrade
Check the work in mono as well as stereo. Quiet monitoring helps judge the voice and leading instruments without being distracted by scale. Compare the exported file in headphones and on another familiar system. A repeating error across many mixes is a reason to examine monitoring; an isolated problem in one song is more likely to need an arrangement or processing decision.
Before adding a subwoofer, identify the missing capability: lower extension, more headroom or smoother bass at the chair. A correctly integrated sub can address the first two; the third often begins with the room. Budget for the pair, cables, stands and basic acoustic treatment. A consistent physical setup and repeatable listening level may improve confidence more than the next driver size alone.
A practical session: beat, bass and voice
Start balancing the rhythmic foundation at a moderate level. Can you distinguish the kick attack from the beginning of the bass note? If they mask each other, investigate arrangement and spectral allocation before increasing playback level. Then introduce the voice or lead synthesiser and check that it remains intelligible through dense passages.
Save a short excerpt after major decisions and compare versions at matched loudness. This helps distinguish an actual improvement from a simple level increase. The 306P should serve as a consistent reference that reveals processing decisions, rather than make every successive version sound more dramatic.
Where the 306P makes sense in a system
This model is especially relevant when a small desktop set limits connectivity or working scale but an eight-inch monitor is difficult to accommodate. Compare candidates at equal levels with the material you actually edit. For speech-led projects, a larger woofer may matter less than comfortable monitoring at a quiet level.
There is no Bluetooth, digital input or shared front-panel stereo volume control. If sources change frequently, plan for an interface or controller. A 2.1 system needs its own subwoofer integration procedure: simply adding low-frequency output does not guarantee more accurate monitoring.
Frequently asked questions
What is the woofer size?
The JBL specification table states 6.5 inches. Distinguish the precise dimension from abbreviated marketing labels.
Do I need an external amplifier?
No. It is powered. Stereo requires two monitors and separate left and right line signals.
Does Boundary EQ replace room treatment?
No. A simple tonal correction cannot remove reflections or room modes.
Video featured on the official JBL page
Sources and the SoundsGood product
JBL 3 Series MkII / LSR310S — Owner’s Manual
An editorial review of design and practical applications using manufacturer documentation, without claiming independent laboratory measurements.
More studio-series reviews
JBL 305P MkII · JBL 308P MkII · JBL 104-BT · JBL LSR310S
Product photographs: SoundsGood catalogue. Cover: editorial illustration.