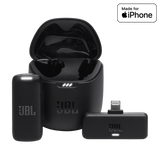
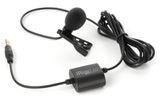
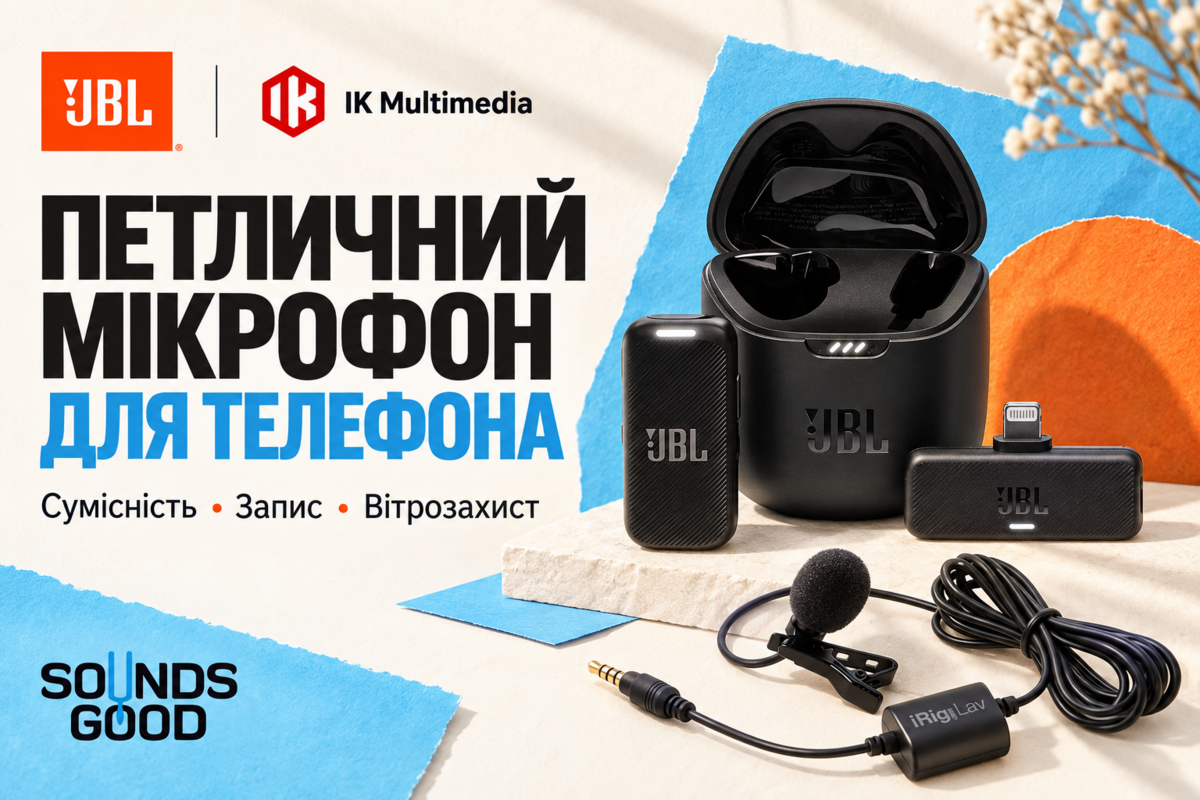
Good video sound starts with the distance between the microphone and the speaker, together with a predictable connection. A phone can produce attractive pictures while recording a distant voice, room reflections and passing traffic at the same time. A lavalier brings the recording position closer to the person and leaves their hands free. It does not fix every room, remove the need to test an app or make an unsuitable adapter compatible. This guide follows the process from choosing a system to checking a finished test recording. The JBL Quantum Stream Wireless Lightning and wired IK Multimedia iRig Mic Lav provide concrete examples. The photographs show their actual construction details. This is an editorial guide based on product documentation and recording preparation, rather than a report of a comparative laboratory test.
1. Describe the recording you actually need
Write down who will speak, where the phone will stand and how the person will move. A lesson at a desk, a walking commentary and a conversation between two guests are different jobs. A cable may be convenient for the first. Freedom of movement and wind protection matter more for the second. The third raises questions about microphone count and how the voices are saved. This description is more useful than searching for the best microphone without a defined task.
Add the conditions that occur regularly: a shirt or sports clothing, a quiet office or busy room, repeatable takes or a single opportunity. Decide whether someone will monitor the sound while you record. When working alone, clear indicators and an easy checking routine may matter more than a feature hidden in a separate menu. Choose a system for your normal working day, with some room for future needs.
2. Check the exact phone model
The words iPhone and Android are not sufficient compatibility information. Identify the exact phone, physical connector, operating system and recording application. Phones from the same manufacturer can have different ports, while apps can handle external audio differently. Check the complete signal path. Being able to insert a plug proves only the mechanical part of the connection, not that the selected camera or streaming application will record its signal.
Give the retailer a specific requirement: recording in a named app on a named phone, with or without its case, and with simultaneous charging if needed. Confirm the receiver version on the order. A photograph of a similar kit is not a substitute for the product code. If a phone upgrade is planned, consider whether the system will remain practical with a different connector. Do not treat an untested adapter as guaranteed future compatibility.
3. Lightning and USB-C are different choices
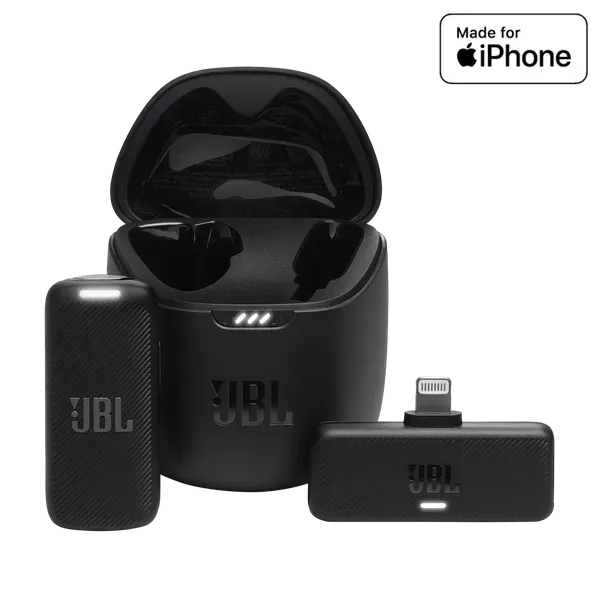
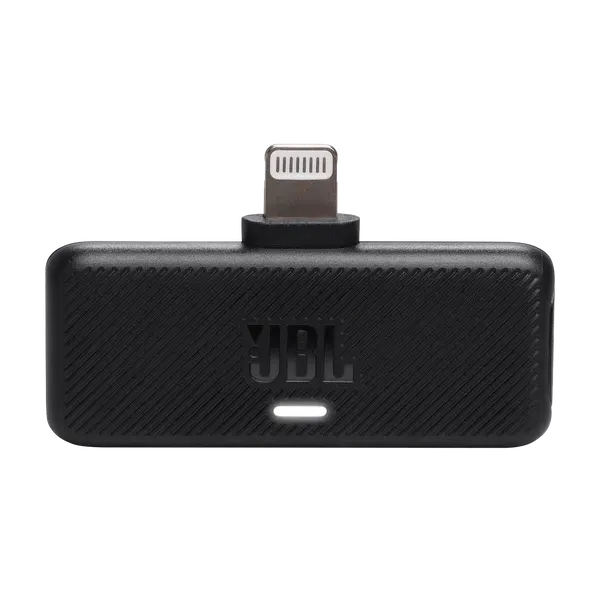
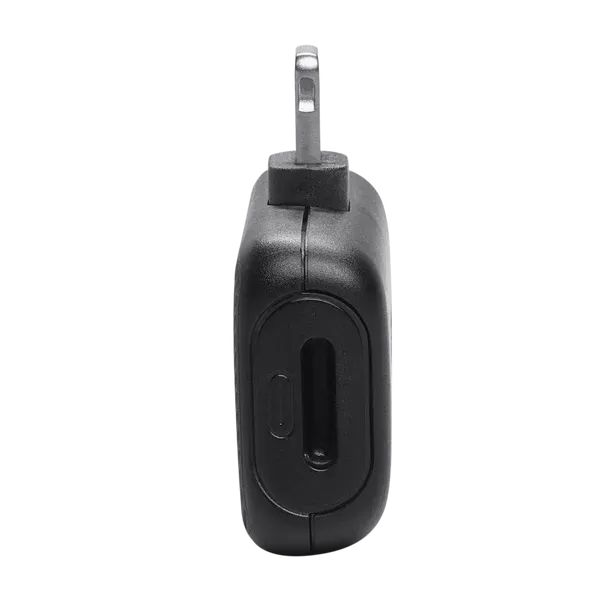
The JBL Quantum Stream Wireless version illustrated here has a Lightning receiver. Do not automatically buy it for a USB-C phone with an arbitrary adapter, assuming that connector shape is the only difference. First confirm that the manufacturer supports the proposed connection. Choosing the version intended for the required connection is usually simpler, followed by a test with the actual recording application.
A USB-C socket on an accessory does not necessarily provide every USB function. One port may carry audio while another supplies power. The additional USB-C port on the JBL Lightning receiver is provided for charging the phone during use; it should not be assumed to be an alternative universal audio output. Read the connection diagram for your exact product before travelling. This matters especially when several people share a kit but use different phones and expect the same setup routine.
4. Understanding TRS and TRRS
Analogue 3.5 mm plugs can have different purposes and contact arrangements. TRRS describes four contact sections, but similar appearance does not establish compatibility with every socket. IK specifies a CTIA/AHJ headset connection for iRig Mic Lav. It needs an appropriate headset microphone input, either directly or through a compatible adapter that actually supports that microphone signal.
A headphone output and a microphone input perform different jobs. An adapter that lets you listen to music does not necessarily accept a lavalier. A camera cable does not become a phone cable simply because both use a 3.5 mm plug. Look for explicit microphone input support in the adapter specification. Avoid a long chain of unidentified converters: every extra connection complicates fault finding and adds mechanical strain. A single documented, tested arrangement is preferable for regular work to a collection of apparently matching plugs.
5. When a wired lavalier makes sense
A wired microphone suits explanations at a desk, teaching videos and short interviews in a fixed position. There is no separate radio link between the person and the phone. That simplifies part of the preparation, but the app, input and cable still require checking. Cable length must suit the camera position. A cable stretched tight is not a normal operating arrangement, even if the signal currently remains stable.
Imagine the person sitting down, turning towards a board or reaching for an object. Leave a little slack near the clip and keep the cable away from moving tripod parts and sharp furniture edges. Remove the microphone before walking away from the phone. For a permanent filming position, this routine can be more useful than additional processing modes. If movement is essential, recognise the cable limitation before buying; extensions do not automatically make an inconvenient arrangement reliable.
6. The iRig Mic Lav example
IK Multimedia iRig Mic Lav is an omnidirectional electret condenser lavalier with a 150 cm cable and a 3.5 mm TRRS plug. Its package includes a removable clip, foam shield and carrying case. The small capsule is easy to place on clothing, but it does not independently resolve every smartphone connection issue. A phone without a suitable analogue headset input needs an appropriate adapter with microphone support.
An additional port has a switchable purpose: IK describes headphone monitoring and chaining a second iRig Mic Lav. Select the arrangement for the number of participants. A monitoring socket does not promise identical delay or behaviour in every application, so test the actual app. Distinguish the single microphone from the 2 Pack when ordering. For an interview, confirm the full kit in advance rather than discovering a missing second microphone or adapter when the guest arrives.

7. What wireless operation changes
A wireless kit separates the phone position from the speaker's route. It can help with product demonstrations, tours, explanations at a board and full-length framing. The long cable disappears, but other tasks take its place: charging the transmitter, fitting the receiver, checking the link and making sure the body on the clothing does not obstruct movement. Freedom of movement is valuable when the content actually needs it.
Do not describe every wireless microphone as Bluetooth equipment. The JBL discussed here carries audio through its own 2.4 GHz receiver. An app used for adjustments does not change that audio path. Choose according to the actual connection rather than a familiar search term. If you work alone, rehearse the start-up and checking sequence several times. You should be confirming readiness before a take, rather than trying to remember indicator meanings while the subject waits.
8. JBL Quantum Stream Wireless Lightning in context
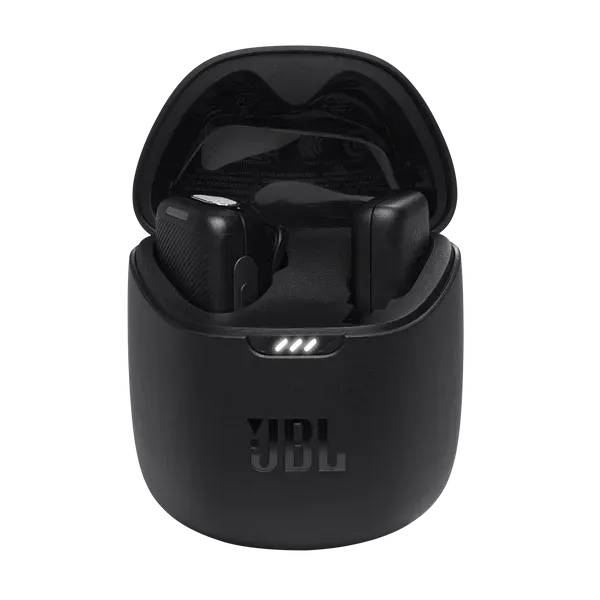
The kit contains one microphone, a Lightning receiver, charging case, windscreen and charging cable. An omnidirectional capsule sits in the clip-on transmitter. JBL provides gain adjustment through JBL Headphones and a mute button with an indicator. Check mute as well as connection before recording. A power light alone does not prove that a usable voice signal is reaching the saved file.
The transmitter's stated recording time is up to six hours. A total that includes recharging from the case is not the same as continuous operation on one charge. Likewise, a maximum range specification does not promise transmission through every wall. In practical terms, this is a compact one-voice system with a particular receiver connector. Another speaker, another phone or a specialised workflow requires separate checking. Do not infer extra audio channels from the appearance of the case or its internal recesses.

9. Omnidirectional does not mean background-free
An omnidirectional capsule accepts sound from different directions. That can help with small head movements, but it does not selectively remove everything around the speaker. The main advantage of a lavalier for conversational video is proximity. If it is too far away, increasing gain raises both the voice and unwanted surroundings. Check placement before assuming that more elaborate processing is necessary.
Listen to the room without headphones first. A fan, open window, coffee machine or nearby loudspeaker may matter more than the difference between two microphone models. Moving the person and phone can be effective. Record the same sentence in two positions and compare at similar playback levels. Do not choose purely because one file is louder. Judge word clarity, the natural quality of the voice and the sound during pauses. A better recording location remains useful even with expensive equipment.
10. Choosing the mounting position
Start with a visible position on the upper clothing where hair, a scarf and the collar do not cover the capsule. There is no exact distance that suits everyone: voices, speaking volume and clothing differ. Aim for a clear voice without directing every breath straight onto the microphone. Ask the person to speak several ordinary sentences after mounting, rather than relying on a whispered count.
Check the picture as well. A larger transmitter can pull a thin shirt down, while a small wired capsule needs careful cable routing. The clip should hold securely without excessive fabric tension. Repeat the test after a clothing change; a successful shirt position may not work on a jacket. Do not hide the capsule simply for appearance until you have checked rubbing noise. A microphone that looks neat but continually rustles is not ready for the main recording.

11. Clothing and cable noise
Rustling often comes from the capsule, shield or cable touching fabric, rather than faulty electronics. A person may stand still during a test and then gesture throughout the actual take. Include the movements expected in the video: turning the head, using the hands and leaning towards a product. This checks the mechanical arrangement under the conditions that matter.
With a wired lavalier, leave a small amount of slack near the clip so movement farther down the cable does not pull on the capsule. Avoid necklaces, zips and stiff jacket edges. Do not tape over microphone openings or use random adhesive materials on the housing. When a particular movement causes noise, change the mounting and repeat that movement. Equalisation is not a dependable substitute for removing the cause. A clean original recording leaves more useful options during editing than recurring mechanical crackle.
12. Wind protection outdoors
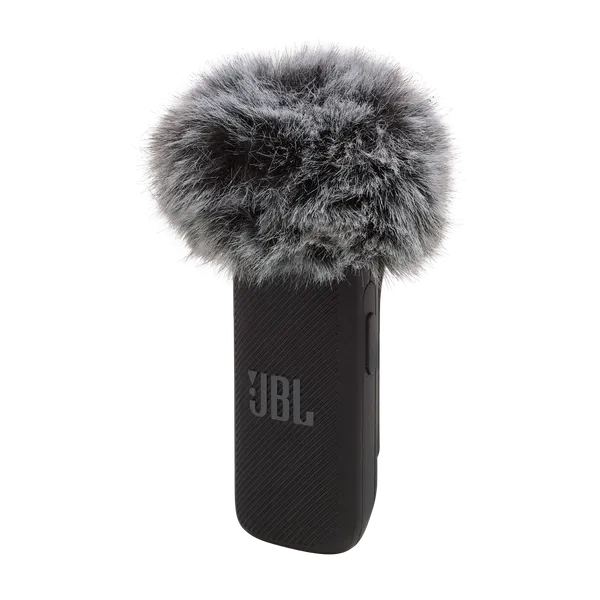
Wind can produce strong low-frequency bursts that overwhelm even a closely recorded voice. Foam and furry shields address related but not identical situations. For an open location, choose protection intended for the particular microphone. It should stay in place and avoid interfering with controls or mounting. A roughly fitting accessory can be inconvenient despite looking similar to the proper one.
Check the shield before leaving: is it fully seated, does it remain secure when you turn, and does it touch the collar? If gusts still spoil the recording, change position or use natural shelter. Processing cannot be relied on to reconstruct words buried beneath severe wind bursts. Inspect the shield after outdoor use. Allow damp components to dry according to the manufacturer's guidance before putting them in a closed case. Packing immediately without inspection can leave the next recording session starting with an avoidable equipment problem.
13. Evaluate noise reduction on your own voice
Digital noise reduction can improve speech intelligibility, but it may also change the voice. Instead of always selecting the strongest setting, record short examples with processing enabled and disabled. Listen to word endings, quiet syllables, laughter and pauses. A silent gap between sentences is not the only quality criterion. The words themselves should remain clear and the voice should not sound unpleasantly interrupted or artificial.
JBL specifies different sample rates with ENC enabled and disabled: 16 and 48 kHz respectively. Evaluate the mode you intend to use rather than transferring an impression from another setting. For spoken video, the decision depends on clarity and vocal character in the finished material. A musical passage may need different judgement. Keep the option of returning to a simpler setup, and avoid stacking several independent noise-reduction processes without checking what each contributes to the final result.
14. Input gain and headphone volume
Input gain sets the level of the signal being recorded. Headphone volume controls how loudly you hear it. These are different adjustments: quiet playback does not necessarily mean a weak input. If the app provides a meter, watch it during normal speech and the most energetic phrase expected in the video. A quiet test cannot reveal overload that appears only during laughter or an emphatic explanation.
Leave room for a sudden increase in voice level. Do not try to keep the meter at its upper limit throughout. If you hear harsh distortion, reduce input gain and record another test instead of simply turning down the headphones. Automatic gain in some applications also deserves evaluation because the background can change between phrases. Reopen the app and check that the settings remain as expected. For important recordings, note the working controls so an accidental change is easy to recognise.
15. Confirm the external microphone is selected
A connected receiver does not guarantee that the phone camera is using it. Put the phone at its working distance, speak near the lavalier and listen to the saved file. Make a separate recording without the external microphone for comparison if necessary. Assess vocal proximity and background sound. There is no need to strike the capsule or blow hard into it; normal speech provides a more useful test.
If the application offers an input selector, check it explicitly. Review microphone permission and the manufacturer's recommended connection sequence. Make another test when switching between a camera, messenger and streaming app. Success in one program does not guarantee identical operation in another. This takes less time than rescuing an interview with missing audio. For regular work, keep a short note of the verified sequence and change it only after confirming the effect of new equipment or software.

16. Monitoring and the saved recording
Headphones can reveal rustling, accidental mute and background noise, but the monitoring method depends on both hardware and software. Not every receiver has a dedicated headphone output, and not every phone camera app handles live monitoring the same way. If real-time listening is essential, establish that capability before purchase. An extra socket in a product photograph is not sufficient evidence by itself.
Even when monitoring works, save and open a test file. That checks the recorded result as well as the incoming signal. When working alone, reserve a minute for this step. Listen to the beginning, a loud phrase and a pause. Confirm that sound continues after any mode change relevant to the shoot. The phone's small speaker is not ideal for detecting subtle rubbing or distortion. Use familiar headphones at a comfortable level and listen through the complete short test.
17. Recording two participants
One lavalier between two people does not always capture equally close voices. Their distances, head movements and speaking styles differ. Decide whether an interview needs two microphones or only the guest's answers. This affects the kit, budget and editing. Placing one capsule somewhere in the middle can force both participants into an unnatural position and make them concentrate on equipment rather than the conversation.
Two transmitters, two microphones in the box and separate recorded tracks are distinct features. Do not assume they always come together. iRig Mic Lav supports chaining two units, but that does not promise independent tracks in every app. The single-microphone JBL kit does not become a two-person system because of the shape of its case. Read the manual and test both voices, including simultaneous speech. If separate processing is required, verify the saved file format rather than merely confirming that both people can be heard.
18. Test wireless range along the actual route
A maximum range specification does not replace a location test. Walls, people, body position and other radio equipment change the conditions. If the plan involves walking down a corridor and returning to camera, test that route with the phone in its final position. A check beside the receiver establishes basic operation, but not the suitability of the full distance or path.
Reproduce the real movements progressively and then listen back. Pay attention to turning away, passing behind objects and reaching the farthest point. Missing syllables matter more than an impressive range figure. Move the phone or shorten the route when necessary. Avoid clamping the receiver or crowding it with accessories without checking the effect. If the environment changes after guests arrive, a short repeat test is reasonable. It is better to adjust the framing beforehand than obtain attractive pictures with broken sentences.
19. Battery planning for a working day
Distinguish transmitter runtime on one charge from total use including case recharges. Recharging requires a break with the microphone off the clothing. For a long lecture or uninterrupted stream, the first figure matters, with practical headroom. Treat a stated runtime as conditional rather than an exact timer that applies to every setting, battery condition and environment.
Charge the kit beforehand and check each component's indicator. When returning the transmitter to the case, confirm that charging has actually started. Poor seating or dirty contacts can leave equipment unprepared. The phone also consumes energy through its screen, video recording and connected accessories. If simultaneous charging is supported, test it with your own power source before the event. Do not organise an entire day around one cable needed by several devices at once. Establish a simple charging and storage routine between recording blocks.
20. Phone cases, tripods and stabilisers
The receiver should seat fully without force or an awkward angle. A thick phone case may obstruct the connection even when the electronics are compatible. Check whether the receiver body touches the tripod clamp. Do not use it as a handle or hang other equipment from the phone port. A reliable setup should not depend on holding the plug with a finger.
With a stabiliser, consider the dimensions and balance of the complete assembly. Fit the phone, receiver and required cables before checking movement through all working positions. Microphone compatibility with the phone does not imply compatibility with every stabiliser. Vertical and horizontal filming can need different arrangements. Make a short movement test before travelling. If the mechanics interfere, change the mounting plan instead of compensating during the shoot. Repeatable stability matters more than having the fewest visible accessories in a photograph of the kit.
21. Lessons and desk presentations
In a quiet room, begin with comfortable seating and a simple connection. Remove objects touching the cable, deal with accessible noise sources and place the phone so the speaker does not keep reaching towards it. Test in the actual chair and clothing. Include turning towards a screen, notebook or board in the sample, because those movements form part of the lesson.
For a wired microphone, plan the cable route beforehand. With a wireless unit, check that the transmitter does not hit the desk when the person leans forward. Avoid placing a loudspeaker reproducing the microphone signal nearby. If the lesson includes a musical instrument demonstration, test that passage separately; settings for quiet speech may not suit a louder source. The aim is understandable material throughout the session. A pleasant introduction cannot compensate for overload, rustling or unclear explanation during the important teaching section.
22. Walking videos and live streams
Movement combines wind, changing surroundings, clothing noise and radio conditions. A check inside a parked car does not establish outdoor performance. Walk part of the route, speak several sentences and listen back. During a product review, pick up the object, lean over and turn. These actions can expose a poor mounting position that seemed satisfactory while speaking motionlessly to the camera.
Live streaming leaves less opportunity to repair a mistake during editing. Check input selection, mute and charge before starting. Use a preview or private test if the platform provides one. Prepare a simple fallback, such as recording closer to the phone after disconnecting the external system. It may be less convenient but is preferable to losing the voice entirely. Avoid changing several settings at once in the middle of an important presentation. Restore a known working arrangement before adding further complexity.
23. Comparing microphones fairly
Record the same passage with the same person, phone position and capsule placement. Compare at similar playback volume because the louder file can create a misleading impression of quality. Listen to pauses, rubbing, head turns and level consistency as well as vocal tone. Assess preparation time too. In daily use, dependable mounting may outweigh a small tonal difference apparent only in concentrated comparison.
Make separate tests indoors and in the actual conditions you expect. Do not credit a microphone with an advantage caused by a quieter location or different processing mode. Note the settings so the comparison can be repeated. If you cannot test before purchase, examine demonstrations critically: do they identify the app, processing, distance and exact product version? A promotional clip does not verify your own combination. A detailed demonstration with reproducible conditions gives more useful information than an unexplained polished result.
24. Troubleshooting missing or distorted sound
Start with full plug insertion, transmitter charge, mute and input selection. Then check app permissions and make a short recording in another compatible program. Change one element at a time. Replacing the cable, application and every setting simultaneously makes it difficult to identify what helped. Good troubleshooting produces a repeatable solution rather than an unexplained moment when sound happens to return.
For an analogue lavalier, check that the adapter supports microphone input. For wireless equipment, check transmitter and receiver connection according to the manual. If sound is present but weak or distorted, revisit placement and gain. Avoid unfamiliar apps or last-minute firmware changes before an important appointment when no testing time remains. For support, prepare the exact phone model, application and connection arrangement. These details are much more useful than a general statement that the microphone does not work.
25. Budget for the complete system
Include the microphone, necessary adapter, wind protection, checking headphones and storage. For interviews, establish whether the price covers one transmitter or the complete required kit. A cheaper unit with several compulsory additions can cost more than a ready-to-use alternative. Compare working systems rather than the price on the main box, especially when an accessory is essential for any recording on your phone.
At the same time, do not pay for complexity you will never use. A verified wired arrangement can be sufficient for a seated lesson. Wireless operation offers a clear advantage when movement matters. Choose for compatibility, mounting, location and control of the result. Finally, confirm the product code, connector and package contents. A successful purchase is a system you can prepare quickly and check confidently before every take, allowing attention to remain on the subject rather than uncertain equipment behaviour.
26. Rehearse before an important recording
Assemble everything beforehand and repeat the complete process: position the phone, connect the microphone, attach it to clothing, open the app and record an introduction plus the loudest expected phrase. Include a characteristic movement, a pause and a closing sentence. Save the file and listen on headphones. This rehearsal checks compatibility, mechanics and the actual output together, rather than merely inspecting separate devices that appear functional.
After a successful test, note the settings and pack the components in a consistent order. Check charging time, the required adapter and outdoor protection. Do not replace a proven connection at the last moment solely because another promises better sound. If conditions change substantially, repeat a short test. A stable routine lets you concentrate on the person and the conversation. The equipment should make speech clear and dependable, without becoming the main source of uncertainty every time filming begins.