SOUNDSGOOD / STUDIO NOTES
A studio subwoofer should improve decisions. We examine the JBL LSR310S, integration with monitors, the roles of 80 Hz and XLF, and a practical sequence for setting up a 2.1 system.
Specifications in context
| Driver | 10″, down-firing |
|---|---|
| Amplification per enclosure | 200 W, Class D |
| LF extension | 27 Hz |
| Maximum peak SPL | 113 dB |
| Crossover modes | 80 Hz / XLF / External |
| Inputs | 2 × XLR / 2 × TRS, balanced |
| Outputs | 2 × XLR |
| Dimensions H × W × D | 448 × 381 × 398 mm |
| Weight per enclosure | 15.6 kg |
Why add a studio subwoofer?
The lowest frequencies are difficult to judge on compact monitors. A mix may contain low-frequency noise, excess synthesiser energy or uneven bass-note balance that the smaller system reveals only partly. The LSR310S adds a dedicated low-frequency path and changes how work can be divided between the subwoofer and main speakers.
It does not automatically make the room more accurate. If bass disappears at the chair because of acoustic cancellation, raising the level may only increase noise elsewhere. Buying a sub means being prepared to configure the whole system. Speech editing may not need it; electronic production and low-frequency effects can benefit much more.
Construction: downward driver, forward port
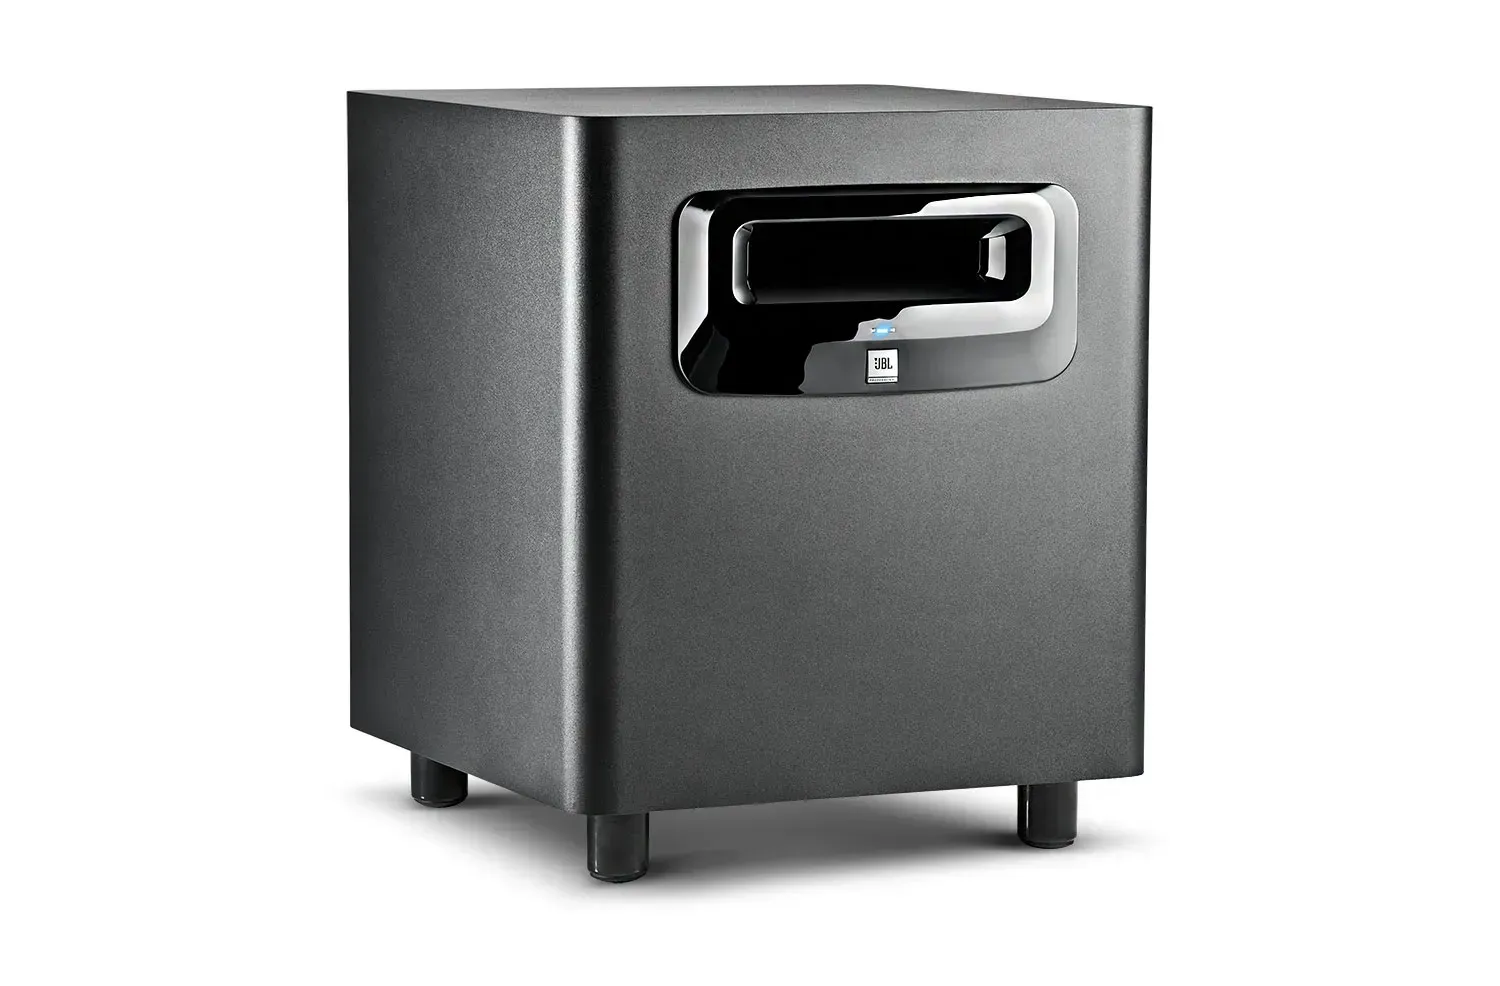
The LSR310S uses a downward-facing ten-inch driver and a front Slip Stream port. Its feet establish clearance beneath the driver. Keep this space clear, and avoid a soft supporting surface that approaches the moving components. The cabinet should remain stable and unobstructed.
The front opening is the port, not the loudspeaker driver itself. Its shape belongs to the acoustic design. Do not stuff it with foam or use it for cable storage. Allow for cabinet dimensions, rear connectors and access to switches without having to move the rest of the studio.
Routing a 2.1 system
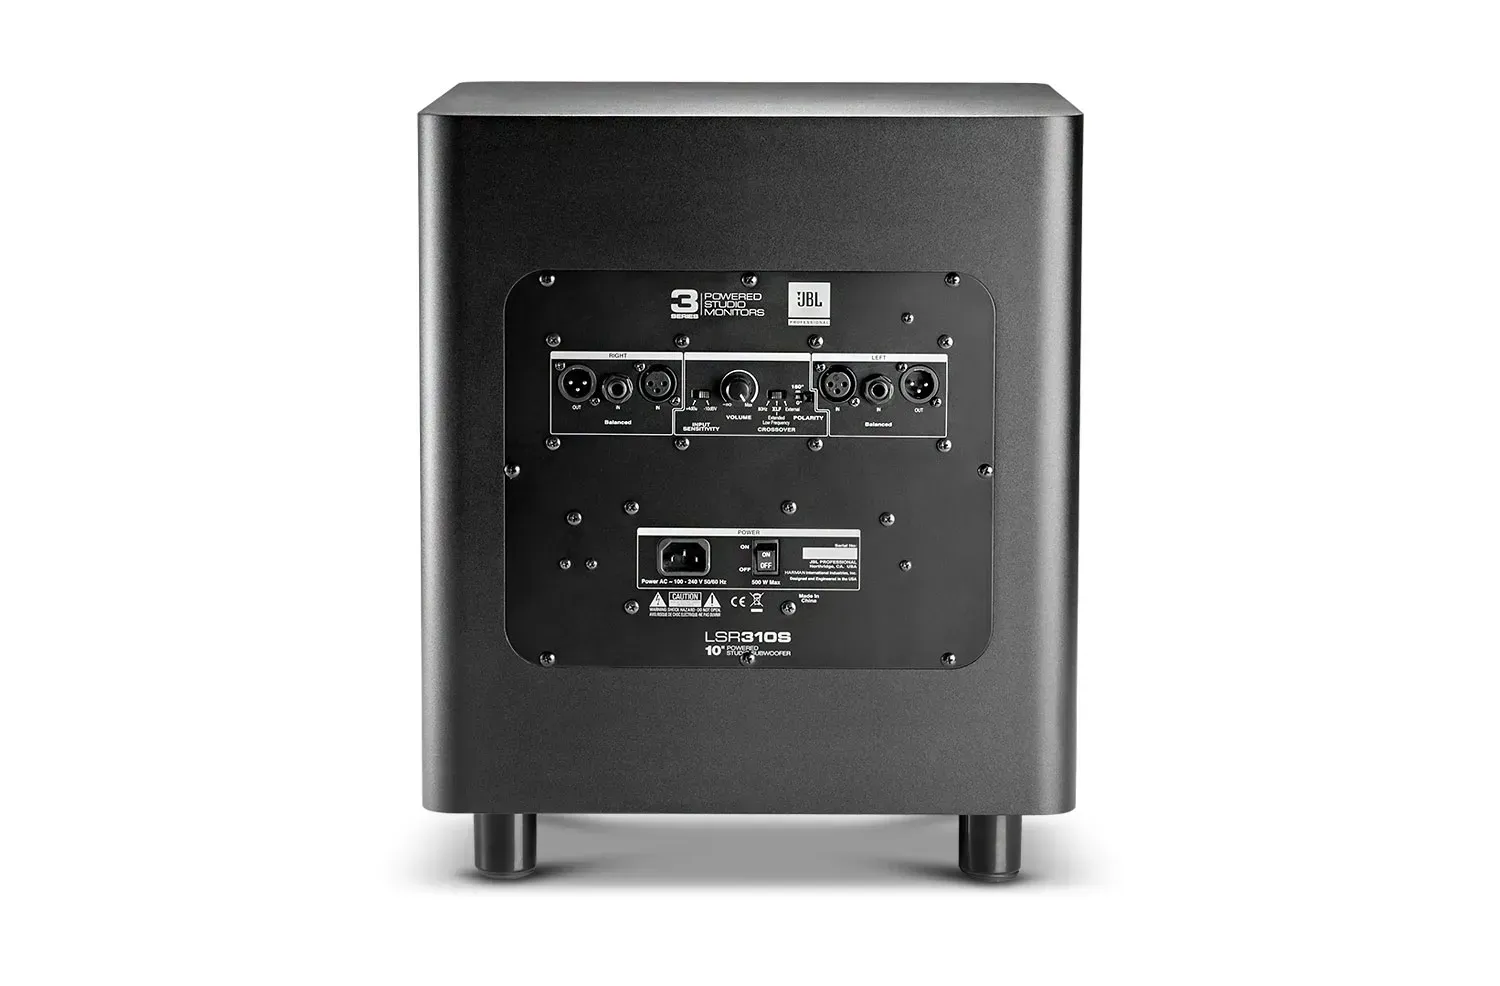
A typical internal-crossover arrangement sends the interface left and right outputs to the corresponding LSR310S inputs, then its two XLR outputs to the main monitors. The sub receives the stereo programme while the mains receive their individual channels through the intended signal path. Match cabling and source sensitivity to line-level operation.
A consumer receiver subwoofer output is not the same as a complete stereo interface output pair. Multichannel LFE and stereo bass management use different routing. Establish where frequency division takes place. Accidentally cascading two crossovers can change the overlap between bands and complicate integration.
Three settings: 80 Hz, XLF and External
The 80 Hz setting is a starting point for integrating the main monitors through the subwoofer crossover. You still need to set level, find a suitable position and check the transition between bands. A switch position alone cannot guarantee an even combined response at your chair.
XLF changes the tuning towards an emphasised low-frequency character that JBL associates with club playback. Treat it as an additional perspective: briefly check whether the bass becomes excessive, then return to your usual monitoring baseline. XLF is not proof that a mix is neutral.
External is intended for an external crossover. A significant detail in the JBL manual is that LEFT/RIGHT OUT are disabled in this position. The main speakers therefore need their signals from the external device. If they fall silent after switching, check the routing before assuming a fault.
Finding a position beyond the space under the desk
The most convenient place for your feet is not necessarily the best acoustic position. Start somewhere accessible, play familiar material with several bass notes and listen from the working chair. Compare a few positions. Seek reasonable consistency rather than the location where one note becomes loudest.
A corner or nearby wall can reinforce bass, but reinforcement is not accuracy. If notes linger, try another position and a small change in listener location. A measurement microphone and room-analysis software can help. One measurement point is not the whole story: assess a small area around the head and confirm the result through listening.
Setting level until the sub stops standing out
Start with a low sub level and raise it gradually until it complements the mains without sounding like a separate attraction. An over-loud subwoofer makes demonstrations impressive but can encourage you to remove bass from every mix. Those exports may then sound thin elsewhere.
Check multiple genres and both short and sustained notes. The relationship between kick and bass should remain intelligible. If the crossover region feels hollow or excessive, examine routing, placement and crossover integration. Avoid changing level, mode and position together; otherwise you cannot identify what actually helped.
Working with 305P, 306P or 308P monitors
For the compact 305P, a sub can reveal a region that is difficult to assess on the five-inch enclosure alone. With the 306P and 308P, the question is required extension and bass-management design, not whether their woofer looks large enough. In every case, configure a complete system rather than the loudest individual box.
Adding a sub does not require a higher daily listening level. At the familiar level, examine the additional information and return to references. Keep a headphone check available to help separate room behaviour from features of the recording. Use it to investigate recurring disagreements rather than chase more bass automatically.
Practical limits and what a successful upgrade looks like
The LSR310S needs mains power and space for a substantial enclosure. Low frequencies travel through buildings, so consider the room when scheduling sessions and choosing level. Isolation supports may reduce mechanical vibration transfer, but they do not soundproof a room or eliminate airborne bass.
Successful integration shows up in decisions: kick-to-bass balance becomes more predictable, excess low-frequency energy becomes easier to spot and exports translate more consistently. If the only change is more bass, setup is not finished. Revisit geometry, level and short comparisons with familiar recordings.

Reading specifications without misreading the sound
A response specified within ±3 dB and a range measured at −10 dB answer different questions. The first describes a relatively even operating band; the second tells you how far an already attenuated signal extends. The lowest number is therefore not a promise of full-level sub-bass. What matters at work is whether you can compare adjacent bass notes reliably, rather than merely detect the lowest one.
Maximum SPL is not a suggested daily listening level. Peak and continuous ratings use different conditions. Compare recordings at the same moderate level: the louder option can seem more convincing even when its bass or treble is excessive. This editorial review does not claim independent laboratory measurements; its application advice follows the design, manufacturer documentation and practical monitoring workflow.
Frequently asked questions
Does it have Bluetooth?
No. It uses analogue line-level XLR/TRS connections.
What does the 27 Hz figure mean?
It is the stated low-frequency extension, not a promise of flat response down to 27 Hz in every room.
Why do the mains go silent in External?
LEFT/RIGHT OUT are disabled in that mode; use the routing supplied by the external crossover.
Should XLF stay enabled all the time?
Use it as an additional check of bass-emphasised playback while retaining a separate baseline monitoring mode.
Video featured on the official JBL page
Sources and the SoundsGood product
JBL 3 Series MkII / LSR310S — Owner’s Manual
An editorial review of design and practical applications using manufacturer documentation, without claiming independent laboratory measurements.
More studio-series reviews
JBL 305P MkII · JBL 306P MkII · JBL 308P MkII · JBL 104-BT
Product photographs: SoundsGood catalogue. Cover: editorial illustration.