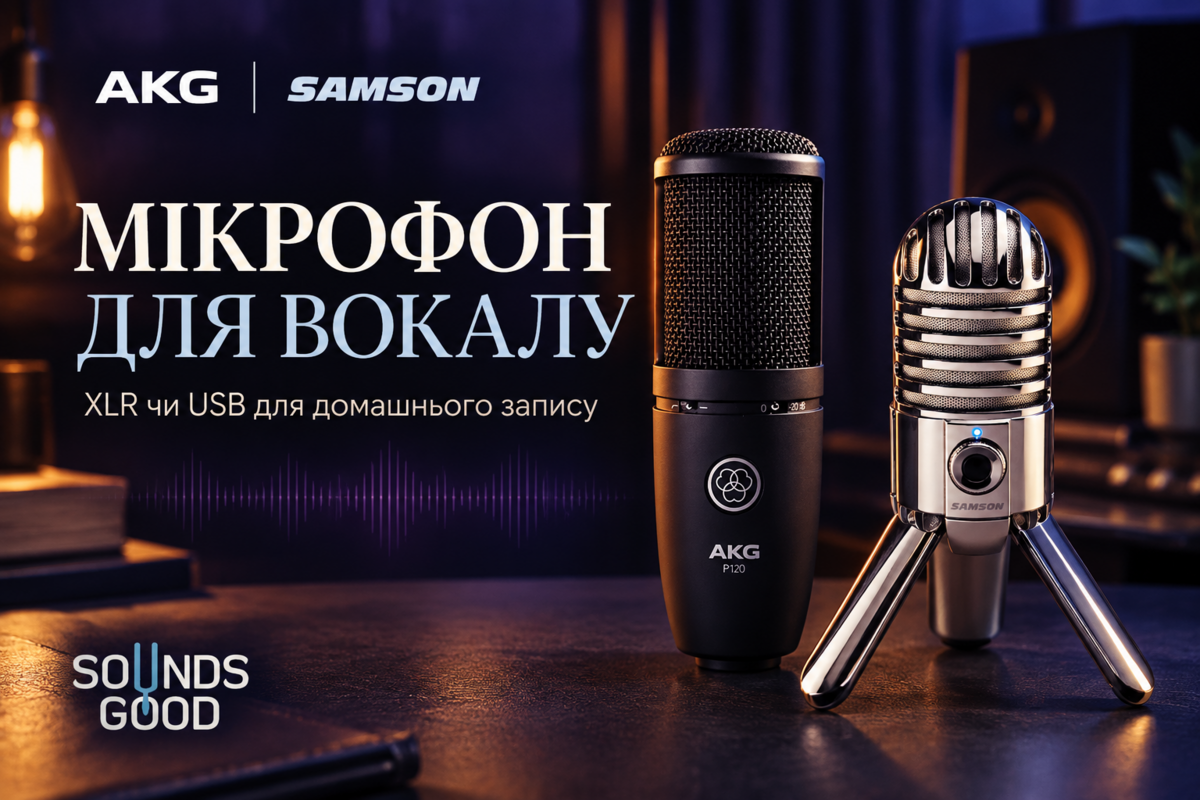
Choose a home vocal microphone as part of the complete recording system. Voice, distance, room, gain and headphones affect the result alongside the name on the microphone. A capable model can disappoint when placed far from the singer beside a noisy computer. Defining the task and establishing a tested routine makes even a compact setup more useful. In this guide, the AKG P120 illustrates an XLR route and the Samson Meteor Mic illustrates USB with an integrated headphone output. Both are condenser microphones, so their comparison explains connection choices rather than contrasting condenser and dynamic operating principles. We will examine placement, monitoring, test recordings and common mistakes without suggesting that one purchase automatically turns an ordinary room into a studio.
Define the recording task
A vocal overdub over an existing backing track, singing while playing guitar and an online lesson have different requirements. One overdub needs a clear input route and comfortable monitoring. Recording voice and instrument simultaneously onto separate tracks may require two inputs and considered microphone positioning. Video-call software adds another factor because it may process the voice automatically.
Describe the normal session before browsing models: which computer is available, whether an interface is already owned, whether the singer stands and whether the equipment travels. That scenario reveals where USB simplifies the process and where XLR provides useful flexibility. It also exposes accessory costs for a stand, cable and headphones. Begin with the working situation rather than the longest specification list. Establish who will operate the system while the singer performs, because practical access to controls can matter every session.
USB and XLR describe connection routes
A USB microphone combines the capsule with electronics that send digital audio to a computer. An XLR microphone normally connects to a suitable microphone input on an interface or other equipment. The connector does not define the performer's level or guarantee a particular tone. USB can suit a compact single-channel workspace, while XLR can support a system with several sources and independently replaceable components.
A simple mechanical adapter is not a complete audio interface. The signal needs appropriate amplification, conversion and sometimes power. If a product is described as an XLR-to-USB cable, establish what electronics it contains and whether it meets the selected microphone's requirements. Matching plug shapes alone is insufficient. Sketch the path from microphone to software input and check each transition. This often reveals a missing component before an incompatible adapter is ordered.
Condenser or dynamic
These terms describe sound-conversion principles rather than a universal quality ranking. A dynamic model can record studio vocals successfully, and a condenser is not restricted exclusively to professionally treated rooms. Voice, pickup pattern, working distance and the available recording chain matter. Compare actual models instead of assigning one sound character to an entire category.
Do not expect a dynamic operating principle to remove the room automatically. The balance between direct voice and reflections also depends on positioning. Singing from far away and increasing gain retains the surrounding sound in the recording. Before buying another type, try changing distance and location. That helps identify whether the limitation belongs to the microphone or its use. A useful purchasing decision starts with an observed problem rather than a claim that one principle always wins in an apartment.
Cardioid does not mean complete isolation
A cardioid pattern favours sound from the front and reduces sensitivity behind the microphone. It does not build an impermeable boundary around the voice. Reflections, a fan and headphone leakage can arrive from different directions. Positioning a noise source relative to the microphone matters, but verify the outcome with a recording rather than relying only on the pattern drawing.
Identify the working side from the model's instructions. Many studio microphones are addressed from the side instead of into the top. Incorrect orientation can produce a quiet or unclear result despite a functional connection. Record a short phrase from the correct side and listen without processing. This basic check comes before complex settings. If it changes the result substantially, establish the correct placement first and only then consider equalisation or another device.
Listen to the room first
Record a few seconds of silence and a short phrase in different positions. Listen for the computer, street, nearby appliances and reflections. Some sounds are easy to overlook while singing but obvious during playback. This test reveals what reaches the file and helps find a better position before spending money on equipment.
Avoid placing the microphone beside a bare wall or in a tight corner merely because the power socket is convenient. Moving the singer and microphone can change the result more than a modest model upgrade. Soft furnishings and considered absorption may help reflections, but they are not complete soundproofing. Reducing outside noise and changing internal room acoustics are different tasks. Keep them separate so that a small panel is not expected to silence traffic or activity in an adjacent room.
Working distance
Start where singing feels comfortable and air blasts remain manageable, then compare a few positions. There is no universal distance for every voice and microphone. Moving closer often increases the proportion of direct voice but may emphasise bass and breathing. Moving away adds space along with more room sound.
Change one variable at a time and repeat the same phrase. Do not immediately compensate for poor placement with an equaliser. If the voice seems too thick or thin, examine distance and orientation first. Mark the useful stand position and use the pop filter as an additional reference. Consistency makes takes easier to combine. When adding lines on another day, a recorded placement helps avoid an abrupt change in apparent room and tone that distracts from the performance.
Pop filters and air blasts
A pop filter helps manage airflow from plosive consonants. It does not remove room echo, electrical noise or every sibilant sound. Position it with usable space between mouth, filter and microphone, without touching the grille. Test words that clearly expose the problem rather than only an easy sustained note.
The singer should not have to hold the head unnaturally still. Find a comfortable repeatable position and a slight angle that does not obstruct performance. If blasts remain, adjust the filter or microphone and repeat the test before recording the whole song. Prevention is easier than repairing strong thumps afterwards. A foam windscreen and a pop filter should not be treated as identical solutions in every situation. Select for the actual task and assess the result with the singer's voice.
Stands and mechanical noise
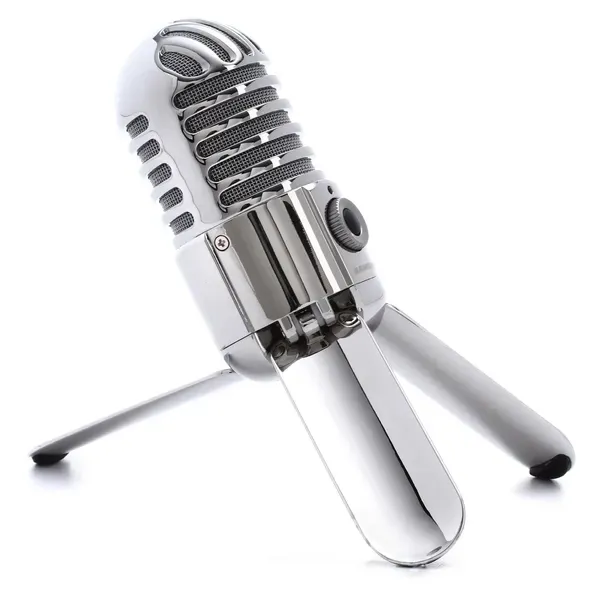
The microphone must remain stable at the required height. Desktop legs are convenient, but a table transmits keyboard taps, hand movements and cable contact. Standing vocals may benefit from a separate stand or compatible arm. Check load capacity and stability, especially when a boom is extended far from its support.
A shock mount can reduce mechanical vibration transmission but does not replace careful placement. Do not assume it is included with every microphone. AKG lists a stand adapter for the P120; other accessories need separate confirmation. During a test, touch the table and move the cable as you normally would. This reveals trouble before a successful vocal take is spoiled. Make sure the cable does not pull the microphone or interfere with natural movement around the stand.
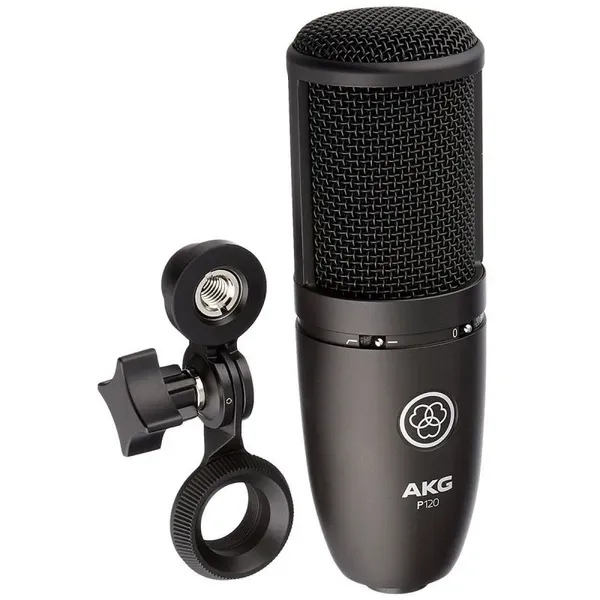
The AKG P120 XLR route
The P120 is a cardioid condenser with a balanced XLR output. It requires suitable phantom power; AKG specifies 44–52 V. The body has attenuation and bass-cut switches. Those functions serve particular purposes and should not be enabled automatically simply because they are available.
A working system requires a compatible microphone input, cable, stand and monitoring arrangement. The P120 is not a USB microphone and does not contain a computer audio interface. Separate components provide flexibility but must be included in the budget. Compare the cost of a usable system rather than the microphone body alone against a device with digital connectivity built in. Someone who already owns a suitable interface starts from a different position from a buyer with no recording equipment. Establish that distinction before comparing prices.
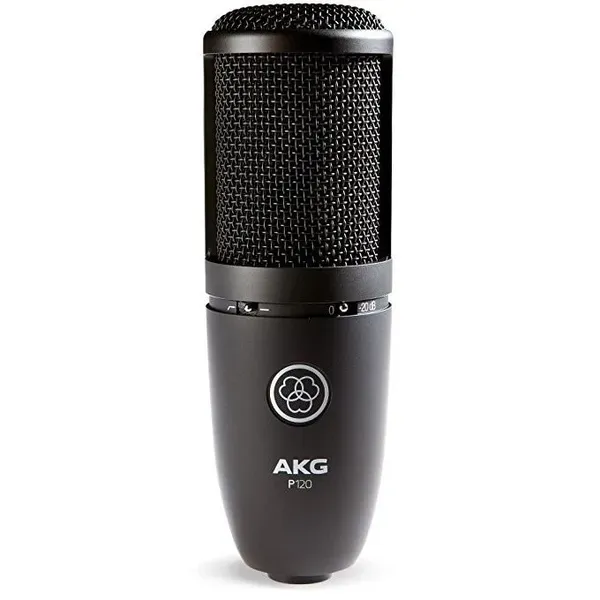
The Samson Meteor Mic USB route
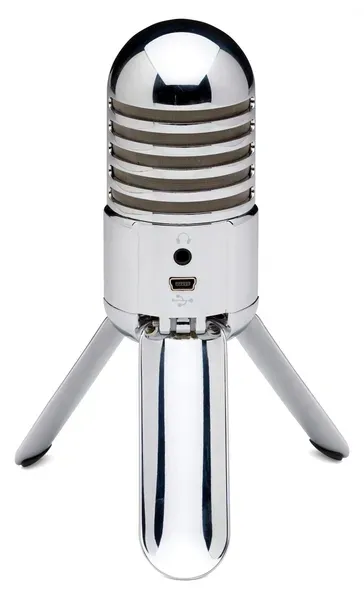
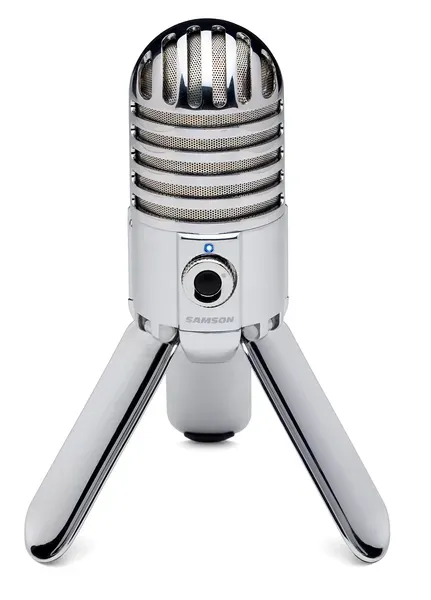
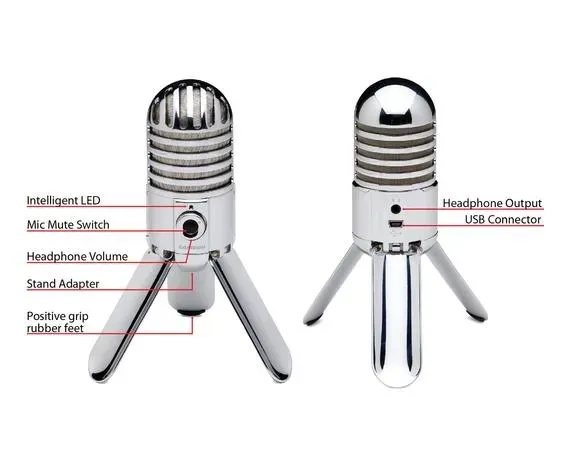
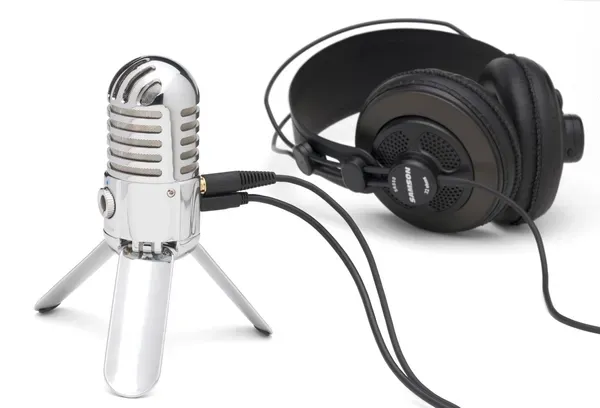
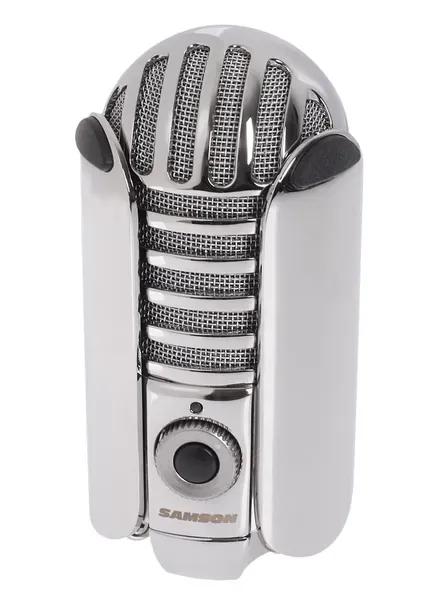
Meteor Mic is a cardioid USB condenser with folding legs, a headphone output and microphone mute. Samson specifies 16-bit recording at 44.1 or 48 kHz. The body control adjusts headphone volume; it should not automatically be interpreted as an analogue recording-gain control.
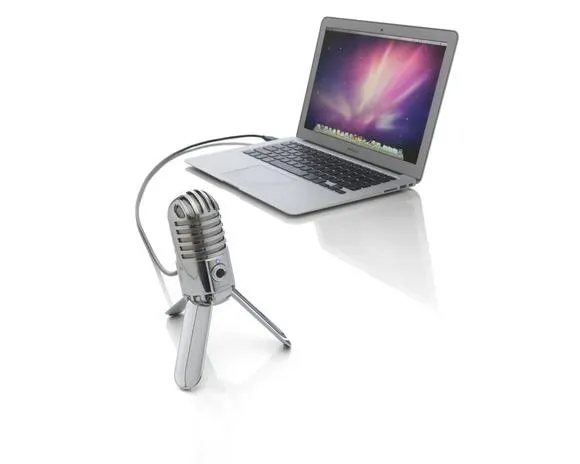
This format can suit a compact single input without a separate XLR interface. Check the specific computer, operating system and application, however. Older promotional photographs with laptops or tablets illustrate a scenario rather than compatibility with every current device. Mobile use depends on adapters, power and software support. This guide concentrates on computer recording. Confirm ports and cabling before purchase so that an apparently simple setup does not require unexpected connections on the first day. Also distinguish demonstrated accessories from actual box contents.
What an audio interface must provide
An XLR microphone needs an appropriate microphone input and preamplifier. A line or instrument input is not a direct equivalent. If several sources must be recorded separately at the same time, confirm independent input count and how those channels appear in the software. A two-channel description can mean different things across devices.
Assess headphone output, direct monitoring and control layout as well. The interface should make setting levels straightforward and let attention return to performance. Do not buy an extra preamplifier in advance because of a general recommendation. First assess available gain, noise and the actual voice level with the chosen microphone. Add hardware for an identified need. A clear initial route makes it easier to determine where a capability is missing and where the existing system simply needs adjustment.
Power and connection order
Check requirements in the microphone and interface instructions. Different models use different power arrangements. The P120 takes suitable phantom power through XLR, while Meteor is powered through USB. A mechanically similar adapter does not prove that electrical requirements are met. Avoid transferring one model's rules to every device with a similar shape.
Lower monitoring volume before making connections and follow the recommended sequence. Do not connect or disconnect components with headphones or speakers turned up loudly. If there is no signal, examine cable, selected input and power in sequence. Switching everything on at random obscures the cause. One-at-a-time checks prevent additional problems during diagnosis. If assistance is needed, provide exact component names rather than only saying that the microphone does not work; the full route is necessary to assess compatibility.
Input level and headroom
Set gain using the loudest intended passage rather than quiet conversation. Ask the singer to perform the chorus as they will in the take. Retain headroom before digital overload. A large waveform is not evidence of a good recording if its peaks are distorted. The level needs to accommodate the real performance dynamics.
Distinguish input gain, playback volume and the track fader. Reducing a fader after an overloaded input does not restore the original clean signal. If the voice is quiet in headphones, the monitoring level may need adjustment rather than gain. Checking the chain separates listening comfort from the condition of the recorded file. Keep a useful starting setting but test again for a new song, since delivery can change. Do not assume yesterday's quiet session established enough headroom for today's energetic performance.
Direct monitoring and latency
Direct monitoring lets the input be heard without travelling through the full software recording route. It can help when latency interferes with singing. Understand whether the headphones contain dry voice, software effects or both signals. Double monitoring may produce an echo-like sensation mistakenly blamed on the microphone.
Check the device settings and the track's software-monitoring option. If effects are used while singing, assess latency in practice and retain a comfortable configuration. Begin with a simple route instead of a complex processing chain. Clear monitoring supports rhythm and pitch and simplifies troubleshooting. When the singer reports an unusual sensation in their own voice, inspect monitoring paths before replacing the microphone or moving it without understanding the cause. A short test usually clarifies whether two routes are active together.
Headphones and backing-track leakage
Backing tracks are normally heard through headphones during vocal recording to keep loudspeaker sound out of the microphone. Headphones can leak too. Check the backing and metronome in vocal pauses. If audible in the file, reduce level and examine fit before attempting aggressive noise reduction.
A closed-back design often suits this use, but evaluate the particular model and comfort. The Meteor photograph with headphones illustrates a connection rather than confirming that headphones are included. Longer sessions benefit from a practical cable, stable fit and a manageable balance between voice and music. The singer should hear clearly without continually moving the microphone. Listen to the saved test separately from the live monitor mix, because loud accompaniment during performance can mask leakage that becomes obvious later.
Software input and recording format
Select the intended device in the application and confirm it is recording the external microphone rather than the laptop's built-in one. Make a short test, change your position relative to the external microphone and listen to the file. A device name in the operating system does not by itself prove the route chosen by a particular application.
One vocal microphone normally feeds one mono track. A stereo headphone output does not make a single capsule's recording stereo. Match the supported device and project format, avoiding accidental changes during a session. Bit depth and sample rate do not describe the whole result. Placement, clean levels and performance remain essential. If the software offers many settings, begin with a supported understandable configuration and verify it by saving and replaying a short file.
Test before the full take
Record a quiet phrase, a loud section, plosive words and a brief pause. Listen without effects for distortion, room sound, background noise, breathing and headphone leakage. A short test can prevent an entire take being compromised by something unnoticed while singing. Include the song's actual challenges rather than only an easy word used to check that the connection works.
Repeat the same material after changes. Moving the stand, adjusting gain and enabling a filter together makes the reason for improvement unclear. Work sequentially and retain the successful version as a baseline. Write down settings and photograph the arrangement. This helps when adding a line on another day. Repeatability matters in editing because an abrupt change of tone or room can distract more than a small performance imperfection. The test is therefore part of preparation, not wasted recording time.
When a pad or filter helps
An attenuation pad reduces level at the point designed by the microphone manufacturer and may be useful for a loud source. A low-cut filter changes the spectrum and can address particular unwanted low-frequency content. Neither should be enabled without listening. Unnecessary attenuation on a quiet voice can make obtaining a useful level harder.
Begin with a clear baseline and identify what the switch is supposed to solve. Compare the same phrase with and without it. A filter cannot remove all room noise; its effect is limited by its response. If the voice becomes too thin, return to the starting configuration and reconsider placement. Features should serve the task rather than maximise the number of enabled functions. Fewer unexplained settings make a successful result easier to reproduce and a changed result easier to diagnose.
Noise and hum
Determine whether the sound exists in the room or arises in the electrical chain. Fans, traffic and reflections require a different approach from a cable problem or incorrect input. Record a pause, inspect connections and substitute one element at a time. Do not begin diagnosis by buying another microphone without evidence of the cause.
If the noise changes with cable movement, examine the connection. If it appears only in one application, inspect processing and device selection there. Avoid questionable electrical modifications to combat hum. Check compatibility and condition instead. Record when the issue occurs: after connection, while a laptop charges, in one program or when something is touched. These observations help support staff diagnose the system rather than replacing evidence with assumptions about a brand's quality.
Processing after recording
Equalisation, compression and reverb can help a vocal fit the arrangement, but they do not replace a useful source recording. Strong reflections, clipping and air blasts are better addressed during capture where possible. Keep an unprocessed take so that decisions can be revisited without another performance.
Start with modest changes and listen alongside the music. An impressive solo sound does not necessarily work in a mix. Do not copy another voice's plugin settings as a universal recipe. If processing becomes increasingly complicated, consider whether it is compensating for poor microphone placement. A short replacement take may help more than lengthy repair. Compare processed and original versions at similar listening levels so that extra loudness does not hide reduced naturalness or intelligibility. The aim is a musical result, not the largest chain of effects.
Comparing microphones fairly
Use the same phrases, comparable placement and similar playback loudness. A louder file often seems more convincing without being better. Compare intelligibility, sibilants, low-frequency balance and how the voice fits the backing. Do not focus only on the loudest note or the microphone's appearance on a stand.
Describe differences specifically and avoid making them universal. One voice may benefit from a character that another does not need. Online demonstrations depend on performer, room and processing. Try the model with your own voice when possible. When choosing remotely, concentrate on compatibility and a clear workflow while keeping tonal expectations measured. A guide can help you ask useful questions, but it cannot reproduce your room and singing style in advance. Treat demonstrations as evidence with context rather than direct promises.
Budget for the whole system
For XLR, include interface, cable, stand, pop filter and headphones. USB may still require a stand or arm, suitable cable and adapter. Comparing microphone prices alone is misleading when one contains digital connectivity and headphone monitoring while another relies on separate components.
Prioritise a system that supports regular recording without technical struggle. Money reserved for convenient positioning can be more useful than a small microphone price upgrade. Do not buy every accessory visible in studio photographs. Assemble a functional minimum, test it and add equipment for an observed task. Before ordering, calculate the total for necessary parts. An omitted stand or cable should not postpone recording after the main device arrives. This approach lets the setup develop with experience rather than with the number of boxes purchased.
The pre-order check
Verify complete model, output, power, required inputs and box contents. Clarify mounting, cabling and monitoring. For USB, check the computer and software; for XLR, check the interface. If singing standing up, confirm the microphone can be positioned at the appropriate height. An attractive desktop arrangement may require another stand to achieve that.
A successful choice works within your system and supports repeatable results. P120 and Meteor illustrate two routes, not universal winners for every voice. Start with the task, assess the room and placement, save a test and then evaluate an upgrade. That sequence makes home recording easier to understand. Equipment should support the musical session instead of creating a chain of unfamiliar components that must be solved immediately before a performance or deadline.
Singing and guitar together
One microphone can capture both sources, but their balance depends heavily on position during performance. The resulting recording does not become two independent tracks afterwards. If separate level changes, processing or overdubs are needed, consider recording separately or using a system with multiple inputs. This is a workflow question as well as a microphone choice.
Test the actual voice and guitar. Does the instrument cover the words, and does movement change the balance too much? Two microphones also require considered placement and checking their combined sound. Buy a second for a defined benefit, not merely to increase the count. Establish whether the interface supports the required freedom. A simple method may be sufficient for a learning record of a complete performance, provided its limitations are understood beforehand.
Takes and file organisation
After the test, save the project with a useful name and check where audio files are stored. Several takes allow performance choices but become confusing without organisation. Include song, date and take number. Note placement or setting changes so that different conditions are not compared as if identical.
Before finishing, reopen the material and confirm the wanted take is saved. An application project and an exported audio file may be different things. Retain originals without irreversible processing and back up important work. If another person needs the recording, check the export itself rather than assuming that saving the project produced a usable audio file. File organisation protects the performer's time regardless of microphone cost and belongs to the practical recording routine.
Online lessons versus local recording
Video-call applications may use noise reduction, automatic gain and echo cancellation. These can help conversation but alter long notes or quiet dynamics unexpectedly. Check the specific program's music mode and available settings. Do not conclude that the microphone is faulty solely from how someone hears a call.
Compare a local unprocessed recording with the transmitted sound. If the file is normal, investigate the application's route and processing. An online lesson also needs a useful accompaniment balance rather than incidental loudspeaker spill. Prepare that before teaching time begins. A separate test allows the teacher to focus on performance while you understand which aspects depend on the microphone and which belong to the communication software. The same hardware can therefore require different settings for calls and music production.
Voice recorded on only one side
A common interface situation is one microphone connected to input one while a stereo track records inputs one and two. The signal then appears only on one side. This is not necessarily a faulty cable. Select the appropriate mono input and repeat a short test, using the actual input signal as a guide because naming differs between applications.
Do not attempt to repair routing with random physical adapters. Examine the track and inputs first. Headphone output can be stereo even though the vocal source is mono. Separating those concepts makes setup clearer. Save a working project template when available so that future sessions begin with a tested route. Recheck assignment after changing devices, however: a convenient old template does not guarantee correct input selection in a newly configured system.
Knowing when to upgrade
An upgrade should address a specific limitation: another independent input, more convenient placement, better monitoring or a microphone character that remains unsuitable after position tests. A clear reason makes the next component easier to choose. Break the broad desire for professional sound into observable tasks first.
Compare recent recordings and identify a repeated issue. Ask a teacher or engineer to hear clean tracks. The next step may involve the room, technique, microphone or interface. On receiving new equipment, verify the contents and save a test on the actual working computer rather than waiting until a deadline. A repeatable sequence of connection, input selection, loud passage and playback allows technology to support singing. Regular work under understandable conditions is the practical result of a well-chosen system.