Choose the construction around the pickup position
Start with the point where the capsule needs to be. A standing vocalist, a guitar cabinet near the floor and a presenter at a desk require different arrangements. Establish source and microphone positions, then check whether the stand can reach that point without obstructing the performer. Maximum height does not describe the whole installation: minimum height, reach and base space also matter. Assess the complete assembly with its holder and cable rather than an empty stand in a vertical position. The intended working angle is part of the selection.
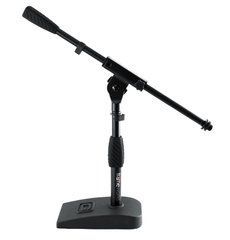
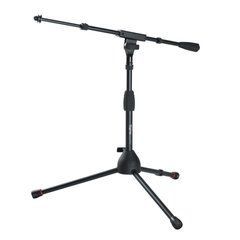
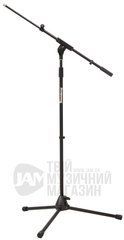
A straight stand works well when its base can sit close to the required vertical line. A boom brings the microphone forward, reaches around an instrument or leaves room for movement. Low stands serve sources near the floor, while desk arms support frequent position changes at a workstation. These are different tasks, so the longest stand is not automatically the most versatile. For several applications, compare adjustment time and transport convenience. Sometimes two appropriate supports are more practical than one construction repeatedly used at the limits of its adjustment.
Load, reach and base stability
Calculate the complete mounted weight: microphone, suspension, adapters and any accessories supported by the same structure. The microphone alone may account for only part of the load. Extending the boom changes the effect on the base, so check the manufacturer's limits for the actual position. Maximum weight figures cannot be compared meaningfully when their stated conditions differ or are unknown. Suitability depends on the complete configuration. Pay particular attention to heavy studio microphones positioned far from the support and arrangements with several additional items on one boom.
Place the base on a suitable level surface with enough room. For tripods, consider leg directions and walkways; for compact weighted bases, consider reach and accidental knocks. The cable should not pull the stand sideways. Test with all equipment fitted and the user present. If maintaining position constantly requires improvised packing, reconsider the model. Unspecified extra weights do not replace following the instructions. The operating position should remain stable during normal activity rather than only in a motionless demonstration immediately after careful placement.
Desk arms and the mounting surface
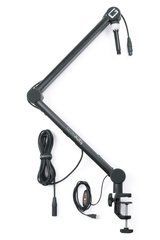
A clamp requires an appropriate desk-edge thickness, shape and condition. Check for frames, drawers or cable trays underneath. The surface must suit the mounting requirements and support the working configuration. Being able to tighten a clamp against an edge does not establish long-term suitability. Measure the available space and consider the arm's complete movement. It should bring the microphone towards the user and move it away without hitting a display. Include hand positions and access to documents when judging whether the arrangement is comfortable.
The catalogue includes Gator Frameworks GFWMICBCBM2000 and GFWMICBCBM3000. Check mounting parts, load requirements and cable management for the chosen version. Gator's official catalogue describes GFWMICBCBM3000 with an internally routed XLR cable; similar-looking arms do not necessarily include the same equipment. A USB microphone or another connector type needs its own compatible connection plan. The arm does not convert signals merely because a cable runs through it. Check mechanics and connectivity separately, then evaluate them together so the cable does not restrict the required movement.
Threads, holders and microphone access
The stand and microphone holder may be sold separately. Confirm the top fitting, any required adapter and the package contents. Common 3/8 and 5/8 inch fittings need an appropriate transition where they differ. Threads should engage straight and secure as intended; do not continue forcing an angled connection. For special suspension mounts, check surrounding clearance, tilt and possible contact between microphone body and boom. The objective is not merely to join the parts but to obtain the required orientation with the microphone accessible and clear of the support.
Connect the cable and check that its plug does not obstruct the desired angle. A pop filter also occupies space and affects convenience. For a handheld microphone, test removal from the clip without shifting the base. For a studio microphone, check switch access and suspension retention. A useful installation supports ordinary actions without repeated dismantling. If the user alternates between sitting and standing, test the entire range with equipment connected. Height endpoints alone are insufficient when intermediate positions are awkward or the cable prevents movement.
Adjustment, cable routing and daily use
Support the mounted equipment while changing position and use the appropriate adjustment mechanism. Do not force a section through a tightened lock. Check that the microphone does not gradually drop under load. At low positions near drums or cabinets, retain access to controls and keep the cable clear of parts that move during performance. Gator's materials identify GFW-MIC-0821 as a compact option for these sources; verify dimensions for the exact version. Do not transfer specifications from a similar model or older illustration without checking the actual product.
Leave cable slack beside moving sections so it does not become the boom's travel limit. Inspect locks, threads and feet after use. Fold the stand according to its instructions for transport and protect vulnerable parts from pressure by other equipment. If a control or support is damaged, identify the intended replacement part. An improvised tape repair does not establish readiness for critical use. Retain the model name for compatible spares. Regular inspection can reveal wear before the stand stops maintaining position during a recording or performance.
Questions before buying a microphone stand
Is microphone weight enough to choose a stand? Include accessories and working reach. Will a desk model fit every table? Check the edge, thickness and clamp location. Is a holder supplied? Consult the actual contents list. Do all stands use the same thread? No; a suitable adapter may be required. Can a tall stand serve a low source? Check minimum position and clearance. Can stability be judged without the microphone? Final assessment requires the full assembly, cable and intended operating orientation within the manufacturer's instructions.
For selection assistance, provide the microphone model, combined weight with its suspension, desired height and distance from base to capsule. Add a photograph of the location and describe how often the stand will move. This supports comparison of floor, low, tabletop and articulated designs. Assemble the selected system according to its instructions and test it with the user. A suitable stand maintains position, stays out of the way and allows settings to be repeated. Confirm these properties before an important session and retain the successful configuration for later setup.
SoundsGood supplies sound equipment for educational institutions, studios, concert halls, conference rooms, and public and private organisations. A technical brief can be used to agree on system components, specifications, a commercial quotation, documentation and delivery arrangements.