Choosing a first saxophone often starts with a sound you want to make. Perhaps the alto's voice catches your attention, or perhaps you imagine yourself playing tenor in a jazz group. Practical questions follow: whether the instrument feels comfortable, what a complete outfit costs, which reeds it needs and where you can practise. A useful decision brings those questions together. Alto is not a compulsory stage before tenor, and a larger instrument is not automatically more professional. Both can support serious study and a long musical life when the particular instrument is suitable and working properly.
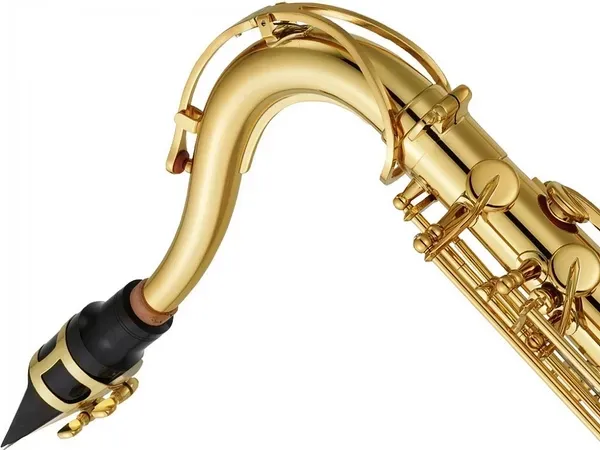
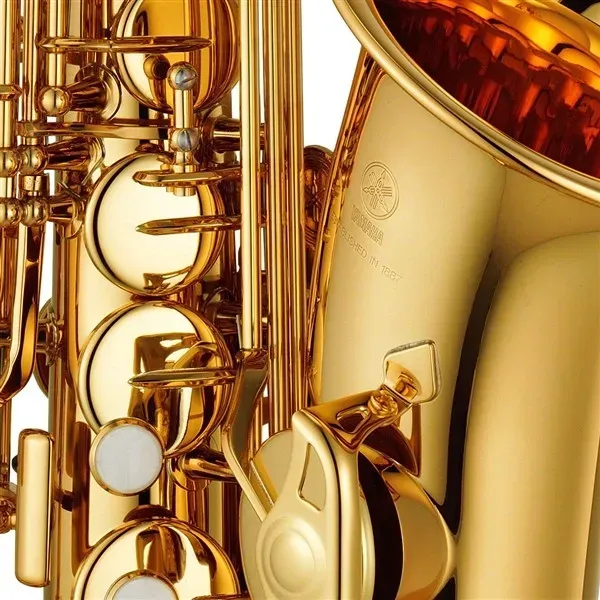
This guide compares them as instruments an ordinary student will use regularly. Photographs of the Yamaha YAS-280 and YTS-280 illustrate construction and accessories, but they cannot replace trying an instrument with appropriate support. The article combines manufacturer information with practical buying criteria; it does not claim that we conducted a laboratory or hands-on comparative test. Check the relevant product listing for availability, the supplied outfit and purchase conditions. The objective is to find a saxophone that lets you practise consistently while developing the voice that interests you.

1. Choose a musical voice rather than a supposed difficulty level
Alto and tenor belong to the same family but occupy different musical positions. The tenor is larger and sounds lower; the alto is more compact and has a higher principal tessitura. Those differences affect the character of a part and the experience of playing, but they do not establish a quality ranking. Alto supports demanding professional repertoire, and tenor can be a first instrument. Separate instrument type from model range, condition and suitability for the player. Comparing a functioning student alto with an older tenor needing repairs changes too many variables to explain the difference between the two voices.
Describe your musical aim in one sentence: learning for pleasure, joining a wind ensemble, playing jazz standards or performing melodies with accompaniment. Then discuss the available route with a teacher. A specific ensemble vacancy is a practical reason to choose a particular instrument. Without that requirement, a persistent preference for one sound can provide motivation. Do not discard that preference because of a general internet rule, but check that comfort and budget support it. A first saxophone should connect an attractive musical idea with a realistic routine rather than satisfy a hierarchy invented by other buyers.
2. Listen to several examples before comparing products
Listen to several players on each instrument in different settings, including a simple melody, a small ensemble and a fuller arrangement. One striking recording can create a narrow expectation. You also hear the player's technique, mouthpiece, room, microphone and production. Two unrelated videos are therefore not a controlled comparison of saxophone types. Look for the register and phrasing that attract you across several performances. Loudness, recording brightness and spectacular high notes do not independently establish which instrument will suit a learner or remain interesting during everyday practice.
Keep a short list of pieces you enjoy and confirm which saxophone appears in them. An unusual colour does not always mean a different instrument: a player can change the sound considerably. If you can hear a live demonstration, ask for a straightforward melody on both types without added effects. Afterwards, describe your preference in ordinary language. Perhaps you enjoy the lower register's presence, the way a line moves above an accompaniment or its relationship with a singer. Specific observations give a teacher more useful information than a request for the universally best saxophone sound.

3. Assess size, balance and playing position together
Product photographs are often scaled to a similar height, so the screen does not provide a reliable size comparison. Try the instruments with properly adjusted support. Notice where the mouthpiece reaches your mouth, where your fingers rest and whether you lift your shoulders or bend your head to start playing. Your hands should operate the mechanism rather than constantly carry the instrument's weight. An unsuitable strap adjustment can make a workable instrument feel awkward and lead you to reject the entire saxophone type for the wrong reason.
Try sitting and standing if both will form part of your lessons. Chair height, music-stand position and the instrument's position relative to your body affect the result. Tenor may need a different placement, but that does not mean every uncomfortable posture is unavoidable. Ask the teacher to show the available options. After a short trial, check whether your fingers remain free and whether you keep wanting to reposition the body. These observations are more useful than assuming that a model described as lightweight must be comfortable for everyone under all circumstances.
4. Fit the individual student instead of using an age rule
Age alone does not determine the right saxophone. Children of the same age differ in height, finger reach and ability to position an instrument comfortably. Alto is often a practical starting point because it is more compact, but an individual assessment still matters. Check the main keys, little-finger controls, head position and support. Buying a tenor to grow into without trying it can create an obstacle to practice. Equally, calling an alto a student instrument does not automatically prove that it fits a particular child without further adjustment.
An adult beginner needs more than the ability to reach every key. Consider usual posture, lesson duration and the journey with the case. When buying for a child, listen to their reaction while separating excitement about appearance from comfort. A first meeting does not require a complete performance. A calm fitting, a check of basic movements and a discussion of lessons can provide useful information. If the instrument clearly prevents a workable position, reconsider the choice or the route into learning. Physical awkwardness is buying information rather than a test of a student's enthusiasm or commitment.
5. Understand the practical meaning of E-flat and B-flat
Alto is normally an E-flat instrument and tenor a B-flat instrument. These are transposing instruments: the written note and the sounding concert pitch differ. Written C on alto produces an E-flat pitch, while written C on tenor produces a B-flat pitch. The immediate consequence is straightforward: playing the same written part with the same fingerings on alto and tenor produces different sounding music. That difference belongs to the instrument family and does not by itself indicate an incorrectly tuned or defective saxophone.
The key designation does not restrict the instrument to music in a single key. Students learn scales and repertoire in different keys on both types. The distinction matters when relating the written part to concert pitch and other musicians. Start with material prepared for your instrument, and ask your teacher to configure the tuner for the exercise. This prevents a correct note from looking wrong because you misunderstood the display. Learn the relationship through short musical examples rather than trying to memorise every possible transposition rule before enjoying your first lessons.
6. Match notation, backing tracks and accompaniment
Before downloading a part, check which instrument it is intended for. A file labelled only saxophone may not provide enough information, particularly when a backing track is included. An alto part and its accompaniment form a matched pair; a tenor part taken from somewhere else may not work with that track. Do not attempt to correct this kind of mismatch by moving the mouthpiece. First confirm the accompaniment key and the purpose of the notation. Otherwise, a simple materials problem can be mistaken for poor tuning or an unsuitable instrument.
At rehearsal, agree whether note names refer to the written part or concert pitch. A teacher or ensemble director can establish a clear convention, and the student can gradually become comfortable with both. If you plan to play with a pianist friend, obtain compatible music from the outset. Fear of transposition should not force the instrument choice: prepared parts remove much of the initial difficulty. Attention to labels remains a useful habit, however, and makes it easier to move between lessons, backing tracks and different ensembles as your musical experience develops.
7. Know which fingering skills will transfer
The basic fingering system is shared across the saxophone family, so learning on alto does not become wasted work when you try tenor. Nevertheless, spacing, mechanical feel, balance and response can differ. Shared fingerings do not mean that adaptation disappears. You still need to become familiar with the instrument's position and learn to produce the sound you want. Experienced players may use several saxophone types, but they continue to practise each one. A common foundation makes transfer easier without making every aspect of performance interchangeable.
For a first purchase, avoid treating the decision as an irreversible lifetime commitment. Learning one type provides a useful basis for another, although it does not replace later practice. Concentrate on a good beginning now. If tenor remains your long-term interest while alto fits the current lesson situation, discuss that path with the teacher. If you start directly on tenor, there is no compulsory alto stage that you have missed. Working condition, sensible instruction and regular feedback matter more than following an imagined sequence of instruments that every musician is supposedly required to own.

8. Buy a mouthpiece for the correct saxophone type
An alto mouthpiece and a tenor mouthpiece are not the same item placed differently on the cork. They have different dimensions and intended applications. Even an identical model designation within a brand does not mean that the physical specifications match across saxophone types. Read a designation such as 4C together with the instrument type. When ordering separately, check the complete product name rather than recognising a familiar number in an abbreviated listing. This small check prevents an accessory purchase that cannot fulfil its intended role in the outfit.
A predictable starting setup agreed with your teacher is useful. Choosing your first saxophone while radically changing its response through an unfamiliar mouthpiece makes comparison difficult: you cannot easily tell which change caused the result. Establish comfort and stability before experimenting. If a mouthpiece is supplied, confirm its exact type and condition. Inclusion in the outfit does not mean it should be used without evaluation, but it does not prove that an expensive replacement is immediately necessary either. Let a specific learning need guide the decision instead of treating upgrades as an automatic part of every purchase.

9. Treat reed strength as part of a complete setup
Alto and tenor mouthpieces need appropriately sized reeds. Do not select a box only by brand and strength number; confirm the instrument type printed on it. The same strength number in different reed ranges does not necessarily produce the same playing feel. Reed design, mouthpiece and player work together. Advice from someone using another series or another saxophone can be a starting point, but it cannot establish a universal choice. Evaluate the actual combination rather than copying an experienced player's equipment list without considering the differences.
A harder reed is not automatically evidence of greater skill. Excessive resistance can make it more difficult for a beginner to understand stable sound production, while a reed that is too light for a particular combination may also limit the desired control. Begin with the teacher's recommendation and a modest reserve of the same reeds. Compare calmly without changing several parameters at once. Consistent practice conditions are more useful than buying a new strength after every imperfect note. Look for repeatable behaviour over practice sessions instead of drawing a final conclusion from one isolated sound.
10. Avoid reducing breathing and embouchure to brute force
The difference between alto and tenor is sometimes reduced to the idea that the larger instrument simply needs harder blowing. That is an inadequate learning instruction. The player needs controlled air, coordinated mouth and lip use, and a suitable mouthpiece and reed. Trying to solve every problem with additional effort can obscure its cause. When sound production is difficult, examine the setup, instruction and instrument condition rather than deciding that the learner is incapable of playing an entire saxophone type. A useful assessment considers the whole situation.
Early exercises benefit from a teacher who can hear the result and see the instrument position. Advice without that information has limits. A shop trial should not become an endurance test. Short, repeatable phrases with breaks provide more useful observations than a prolonged struggle to play loudly. If one instrument feels much more difficult, check the comparison conditions first. An unsuitable reed or a mechanical issue can create an impression wrongly attributed to all tenors or all altos. The purpose is to establish normal working conditions, not to overcome unknown resistance through increasing effort.
11. Organise a fair first playing comparison
Both instruments should be functioning properly with appropriate mouthpieces and usable reeds. Ask an experienced player to demonstrate each, then try them yourself within your current ability. Their demonstration can show that the instrument works; your attempt helps assess personal comfort. These are related but different questions. A seller's attractive performance does not prove that the instrument fits you, and an uncertain beginner's attempt does not prove that it cannot. Keeping those observations separate prevents one impressive or disappointing moment from deciding the purchase on its own.
Use a familiar short sequence or individual notes if you have not yet learned a melody. Notice how the sound begins, how the fingers sit and whether you can repeat the result without sharply increasing effort. Do not give the tone a final rating in the first few seconds. A beginner needs time to become accustomed to the mouthpiece and position. Afterwards, explain to the teacher which instrument appealed and why. Specific observations help distinguish temporary unfamiliarity from persistent awkwardness. If the result remains unclear, a calm repeat under known conditions is better than deciding because you feel rushed or tired.
12. Plan somewhere realistic to practise
Alto and tenor are acoustic wind instruments. Neither should be chosen as a guaranteed silent option for an apartment. What other people hear depends on playing, the room, building construction and practice time. Before buying, consider where regular practice can happen, whether a teaching room is available and how a home schedule can work. An unsuitable practice arrangement can limit progress more than the difference between two good instruments. Solve that organisational question early so the saxophone does not become an attractive object that is rarely taken out of its case.
Do not assume that every session can use an extremely restrained approach if that prevents normal sound development. Devices intended to reduce volume have their own limitations; a product called a mute does not guarantee silence. Reading music, rhythm work and listening can occupy part of the schedule, but they do not replace playing. A practical plan combines available sounding time with those activities. Discuss the real home situation with the teacher and seek a workable routine. The instrument choice should support regular use rather than depend on a promise to remove its acoustic nature completely.
13. Consider the Yamaha YAS-280 as a student alto example
Yamaha presents the YAS-280 as a student alto saxophone. Its published description draws attention to ergonomic construction, the octave mechanism and the connection involved in low-key operation. Such details matter to a buyer through their intended practical outcome: dependable response and a manageable introduction to basic technique. Manufacturer information does not remove the need to check the particular instrument after transport and fit the setup to the student. Even a new model needs correct assembly, a suitable playing position and an attentive first introduction.
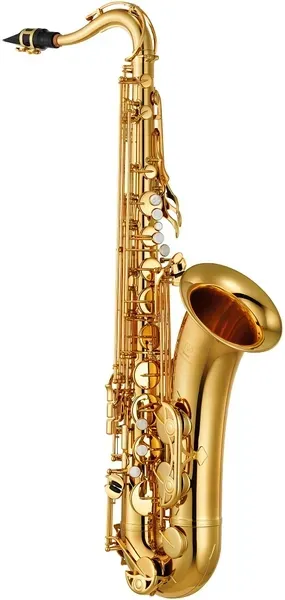
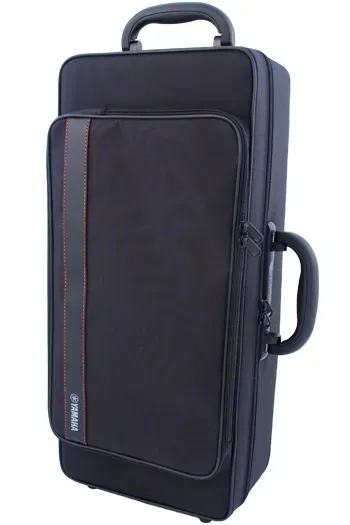
The photographs show the alto's overall shape, neck, principal keywork and case. Use them to prepare questions rather than decide your own fit remotely. Ask to see the little-finger controls and where the mouthpiece sits after adjusting the strap. A catalogue may contain several listings for the same model with different product codes and conditions. Check the actual listing and outfit you are considering. Choosing a YAS-280 should be an informed decision about a student instrument, not an assumption that a recognised name answers every personal and practical question without a trial.
14. Consider the Yamaha YTS-280 as a student tenor example
The YTS-280 represents the tenor version of the student range. Yamaha's specification lists B-flat tuning, high F-sharp and Front F auxiliary keys, an adjustable thumb hook, a 4C mouthpiece and an included case. Confirm the outfit supplied with the particular offer. These features do not make tenor the next level after alto; it is another family voice with different size and feel. If its sound is the one you consistently enjoy, an instrument of this class can be a sensible candidate for a first in-person trial.
Compare it with the alto beyond the purchase price. Include case size, carrying convenience, appropriate accessories and how the instrument sits during a lesson. The photographs show the different neck profile and larger overall silhouette, but image scaling is not a measurement. An unavailable model should not push you into an arbitrary replacement without assessment. If another tenor range becomes the candidate, repeat the fit and outfit checks. Familiarity with one model helps you ask better questions but cannot establish a universal conclusion about every tenor saxophone offered for sale.
15. Compare new and used instruments by working condition
A comparison between a new alto and a used tenor must include condition. A lower advertised price may exclude servicing, pad work or regulation. A well-maintained used example can also be a practical option when it has been assessed and the budget is understood. Do not decide from lacquer shine or model age alone. Ask a teacher to assess playing and a repair specialist to investigate sealing, mechanism and repair requirements. Those checks complement each other, and service history provides useful context without replacing an examination of current condition.
For a first instrument, establish whether lessons can start immediately. A restoration project and a ready student outfit solve different problems. If workshop attention is needed, clarify its scope and timing before buying. Our separate used-saxophone inspection guide examines the body, neck, pads, case and playing assessment in detail. The essential principle here is not to confuse differences in condition with differences between instrument types. A leaking tenor does not demonstrate normal tenor behaviour, just as an incorrectly regulated alto does not represent what a functioning alto can offer a student.
16. Include support in the comfort assessment
A strap or harness is part of the outfit rather than a decorative extra. Check the attachment, adjustment range and whether the mouthpiece can reach a useful height without the hands continually lifting the body. A strap that suits another player may not suit you. Try a harness with the actual instrument instead of judging it only by its description. Support can become particularly noticeable with tenor because of its size, but alto should also be held correctly. The accessory should help maintain an ordinary working position throughout a lesson.
Ask the teacher to inspect the adjustment from the side and front. A beginner may not notice bending towards a low mouthpiece or raising the body with the fingers. After changing the height, recheck key reach and seated position. An expensive accessory is not automatically the answer; a design that works with your actual posture is more useful. If comfort deteriorates during practice, revisit the adjustment rather than accepting persistent tension as inevitable. A small setup change can sometimes matter more than replacing the instrument with another model that has not been tried properly.
17. Assess the case and the journey to lessons
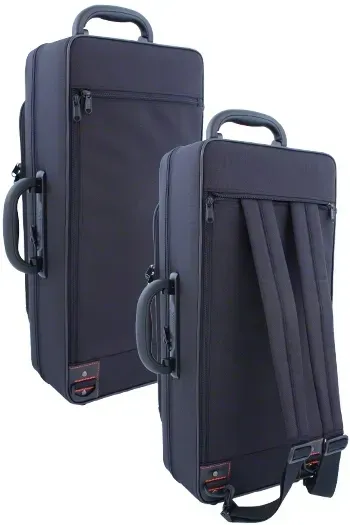
Consider the saxophone together with its case, especially if public transport is part of your weekly routine. Check handles, straps, fastenings and practical storage for music and small accessories. The inside must fit the instrument; similar-looking cases are not necessarily interchangeable. Do not press a lid closed over an unsuitable fit. Separate accommodation for the neck and accessories prevents loose objects from moving against keywork. Reliable transport has direct value in a student outfit, even when it seems less exciting than discussions about tone or model reputation.
At home, decide where the case and normal cleaning routine will go. The instrument should not be left where it is easily knocked or pressed by other belongings. Remove moisture with suitable accessories following the manufacturer's guidance, and do not leave a wet cleaning item inside as a substitute for drying. These habits matter for both alto and tenor. Size changes the particular accessory required, but not the need for careful assembly, disassembly and storage. A convenient routine is easier to maintain than one that must be improvised after every lesson.
18. Budget for a complete start
Count more than the saxophone body. Suitable reeds, support, care materials, a music stand and learning resources may be needed before regular lessons begin. Some items may already be supplied, so confirm the outfit before adding missing pieces. Include assessed servicing for a used instrument. This approach compares readiness to learn rather than two incomplete price tags. Alto and tenor need broadly similar categories of accessories, but the actual products must match their type. Buying an unsuitable item to save money can simply create the need to purchase it again.
Preserve resources for teaching and ordinary consumables. A predictable instrument with access to a teacher is often more useful to a beginner than a more expensive model that leaves no room for lessons. There is no need to buy every possible upgrade at once. The first outfit should support normal practice, while later purchases can follow clear needs. If tenor appeals more but its complete cost exceeds the budget, consider other assessed offers or temporary access through a school. Do not sacrifice working condition merely to own the preferred instrument name immediately.

19. Make the shop trial manageable
Arrange a trial and confirm which models are actually available. Bring a teacher if possible and prepare a short list of questions. Begin with fit, then move to sound and mechanical behaviour. Avoid trying a large number of instruments in rapid succession, because the impressions quickly become difficult to separate. A few appropriate candidates assessed by the same criteria are sufficient for an initial decision. Ask what is included and how setup questions after purchase are handled. The first weeks of ownership deserve consideration alongside the instrument itself.
Afterwards, record concrete conclusions: hand comfort, preferred voice, carrying concerns and total outfit cost. An unclear result is a reasonable reason to think further; there is no need to manufacture instant certainty. At the same time, do not search for a saxophone that produces a professional sound without learning. A useful trial establishes suitability and identifies obvious obstacles. Your later tone will develop through work. A short demonstration supports a buying decision, but it cannot replace the process of building control, listening skills and familiarity with your own instrument.
20. Agree on an initial learning routine
After choosing, keep the setup stable for the initial period. Learn correct assembly, reed placement, support adjustment and repeatable sound production. Rhythm, notation, finger coordination and short musical phrases can then develop at an appropriate pace. The sequence belongs to the individual learner, so a universal calendar promising guaranteed results is unhelpful. Understanding the purpose of an exercise and receiving correction matter more than simply extending practice time. Both alto and tenor need that attention to basic actions even when their voices sound distinctly different from the beginning.
Discuss how to keep questions between lessons. A short recording of a familiar exercise may help if the teacher agrees to that format, but avoid judging yourself continually through a phone microphone. The device and room affect the impression. Useful everyday targets include a consistent start to the note, a workable posture, coordinated movements and a recognisable phrase. A well-chosen saxophone supports that work rather than replacing it. When a difficulty persists, describing the conditions clearly is more productive than immediately searching for a different mouthpiece or another instrument model.
21. Expect adaptation when moving from alto to tenor
If you later add another saxophone type, many musical skills and basic fingerings will remain useful. You will still need to adapt your sound concept, mouthpiece position, reed setup and listening orientation. Do not judge the change as a failure after one attempt. Look for growing consistency on the new instrument rather than demanding an immediate copy of your established sound on another. Familiar exercises help because they allow attention to the changed sensations without adding unfamiliar musical material. Experience assists adaptation but does not make it entirely automatic.
Check notation and accompaniment separately, since the same fingerings do not produce the same concert pitch on alto and tenor. Prepare the correct parts beforehand. Avoid rushing to sell a familiar outfit before understanding how the new instrument fits your routine. For one player, the second saxophone becomes the main instrument; for another, it remains an additional voice for particular projects. Both are reasonable. The first purchase need not define an entire musical biography, but it should provide a dependable beginning now and enough experience to make later choices more informed.
22. Choose according to the actual situation
Without a specific ensemble requirement, compactness and a workable fit for a younger student may make alto the first candidate to assess with a teacher. If tenor's voice consistently attracts you and the instrument fits comfortably, it is reasonable to consider starting there. An ensemble's genuine need for a particular part should also enter the decision. Adults returning to music should weigh familiar skills against present comfort rather than relying only on their earlier instrument choice. In every case, check condition, the supplied outfit and the complete budget.
The decision ultimately rests on a few connected answers: which sound motivates you, which instrument works in your hands, where regular practice can happen and whether the full start is affordable. When those conditions align, either alto or tenor can be a good purchase. Photographs and specifications prepare you for the comparison; a personal trial and informed guidance make it concrete. Look for an instrument you will want to work with regularly. That relationship matters more than declaring one saxophone type universally correct for every beginner regardless of their interests, fit and musical plans.